
As I stood in my kitchen, the rich, toasty aroma of roasted garlic filled the air, instantly transporting me to a cozy bistro in the heart of a bustling city. That’s when I realized I needed a delicious twist on a classic comfort food, and thus my Cheesy Garlic Chicken Wraps were born. These wraps marry tender rotisserie chicken with a velvety, garlic-infused sauce and ooey-gooey cheese, creating a meal that's not only quick to whip up but also completely customizable to suit any palate. Whether it's a busy weeknight or a leisurely family gathering, these wraps serve as a delightful escape from the routine of fast food and are guaranteed to be a crowd-pleaser. So, ready to elevate your dinner game? Let’s dive into crafting these irresistible bites together!
Why will you crave these wraps?
Customization at Its Best: You can adjust ingredients to match your taste, swapping in different cheeses or proteins effortlessly.
Rich Garlic Flavor: The roasted garlic sauce infuses each bite with a savory depth that elevates the dish to gourmet status.
Quick & Easy: Whip up these wraps in under 30 minutes, making them perfect for busy weeknights.
Crowd-Pleasing Delight: Whether it's a family dinner or a party, these wraps are a hit with everyone, sure to impress your guests.
Hearty & Satisfying: The combination of creamy cheese and tender chicken provides that comforting feeling we all crave. Don't miss out; for more easy comfort food inspirations, check out quick weeknight meals.
Cheesy Garlic Chicken Wraps Ingredients
• Get ready for a delicious adventure!
For the Filling
• Rotisserie Chicken – Provides a savory protein base; alternatively, use any leftover cooked chicken for a quick prep.
• Garlic Bulbs – Infuse the sauce with rich, roasted flavor; remember to roast until soft for maximum taste.
• Heavy Cream – Creates a velvety sauce that adds richness; you can substitute with light cream or milk for a lighter version.
• Butter – For sautéing the garlic and enhancing flavor; olive oil works as a lighter alternative.
For the Wraps
• Flour Tortillas – These hold all the goodness together; opt for gluten-free tortillas for a gluten-free option.
• Cheese Blend (e.g., Cheddar, Mozzarella) – Adds creaminess and depth; consider swapping for Gouda or Monterey Jack for a unique twist.
For Roasting
• Olive Oil – Essential for roasting garlic; any neutral cooking oil can serve as a substitute.
• Salt & Pepper – Those classic seasonings that elevate flavor to perfection.
Now that you have your ingredients ready, let’s move on to crafting these Cheesy Garlic Chicken Wraps that will have everyone craving more!
Step‑by‑Step Instructions for Cheesy Garlic Chicken Wraps
Step 1: Roast the Garlic
Preheat your oven to 350°F (175°C). Slice the tops off the garlic bulbs, drizzle them lightly with olive oil, and season with salt and pepper. Wrap them in foil and roast for about 30 minutes until golden and tender. This will coax out the sweet, rich flavors of the garlic, setting a delicious foundation for your Cheesy Garlic Chicken Wraps.
Step 2: Prepare the Garlic Paste
Once the roasted garlic has slightly cooled, squeeze the soft cloves into a bowl and mash them into a smooth paste. This creamy garlic goodness will be the heart of your sauce, adding depth to your wraps. Keep it aside while you prepare the rest of the dish to enhance the flavors even more.
Step 3: Make the Creamy Sauce
In a medium skillet, melt 2 tablespoons of butter over medium heat. Stir in the mashed garlic paste, letting it infuse the butter for about 2 minutes until fragrant. Gradually whisk in 1 cup of heavy cream, allowing the mixture to simmer gently. Cook until it thickens and coats the back of a spoon, which should take about 5–7 minutes, creating a luscious sauce for your Cheesy Garlic Chicken Wraps.
Step 4: Assemble the Wraps
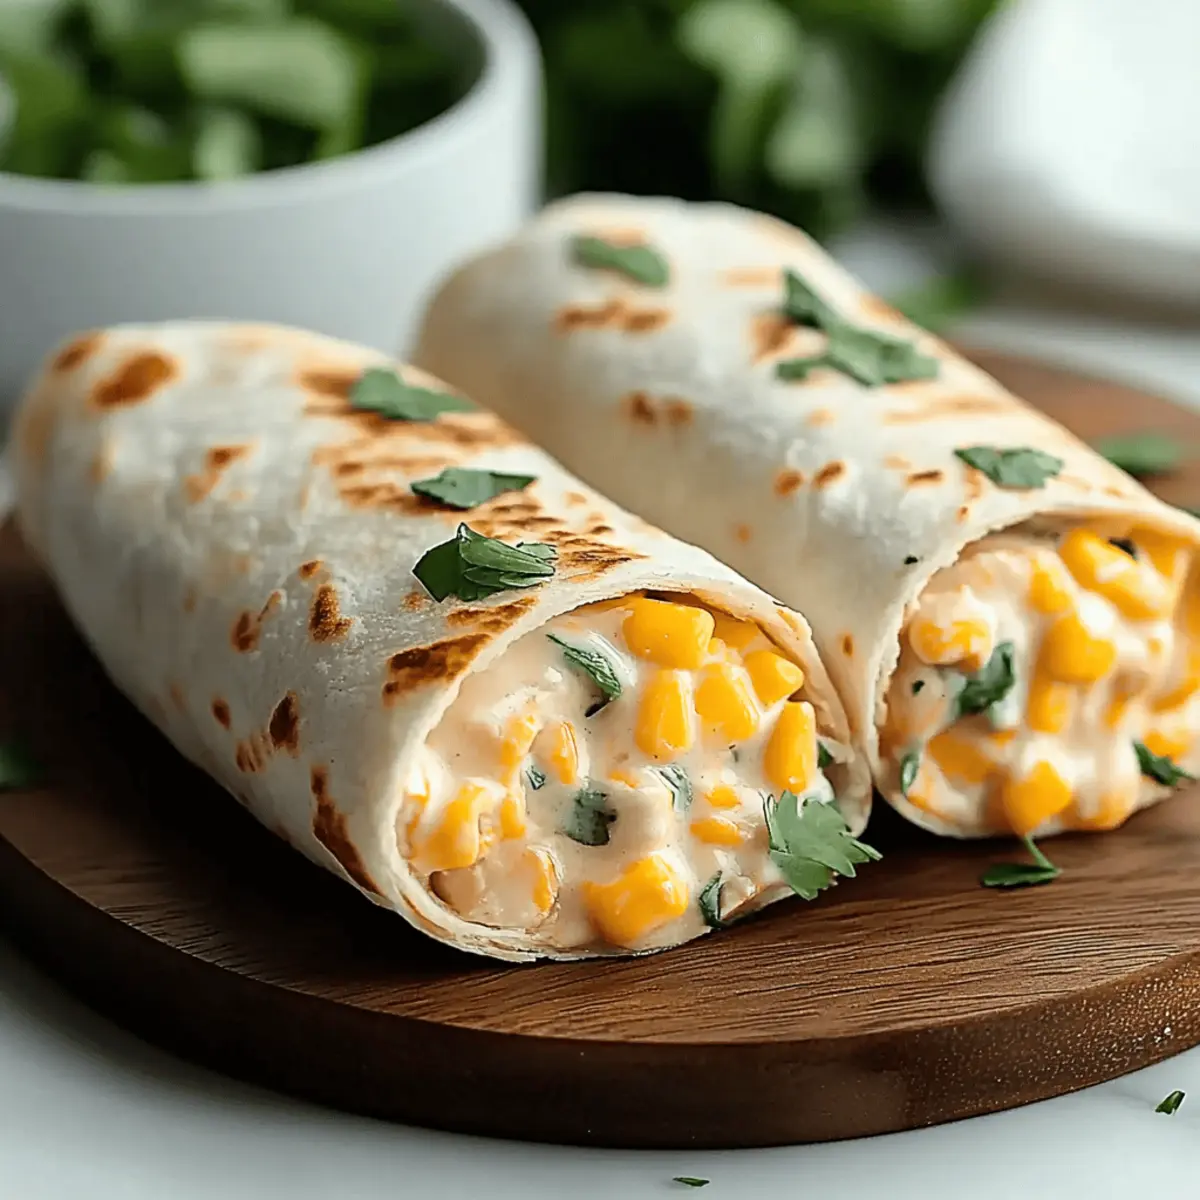
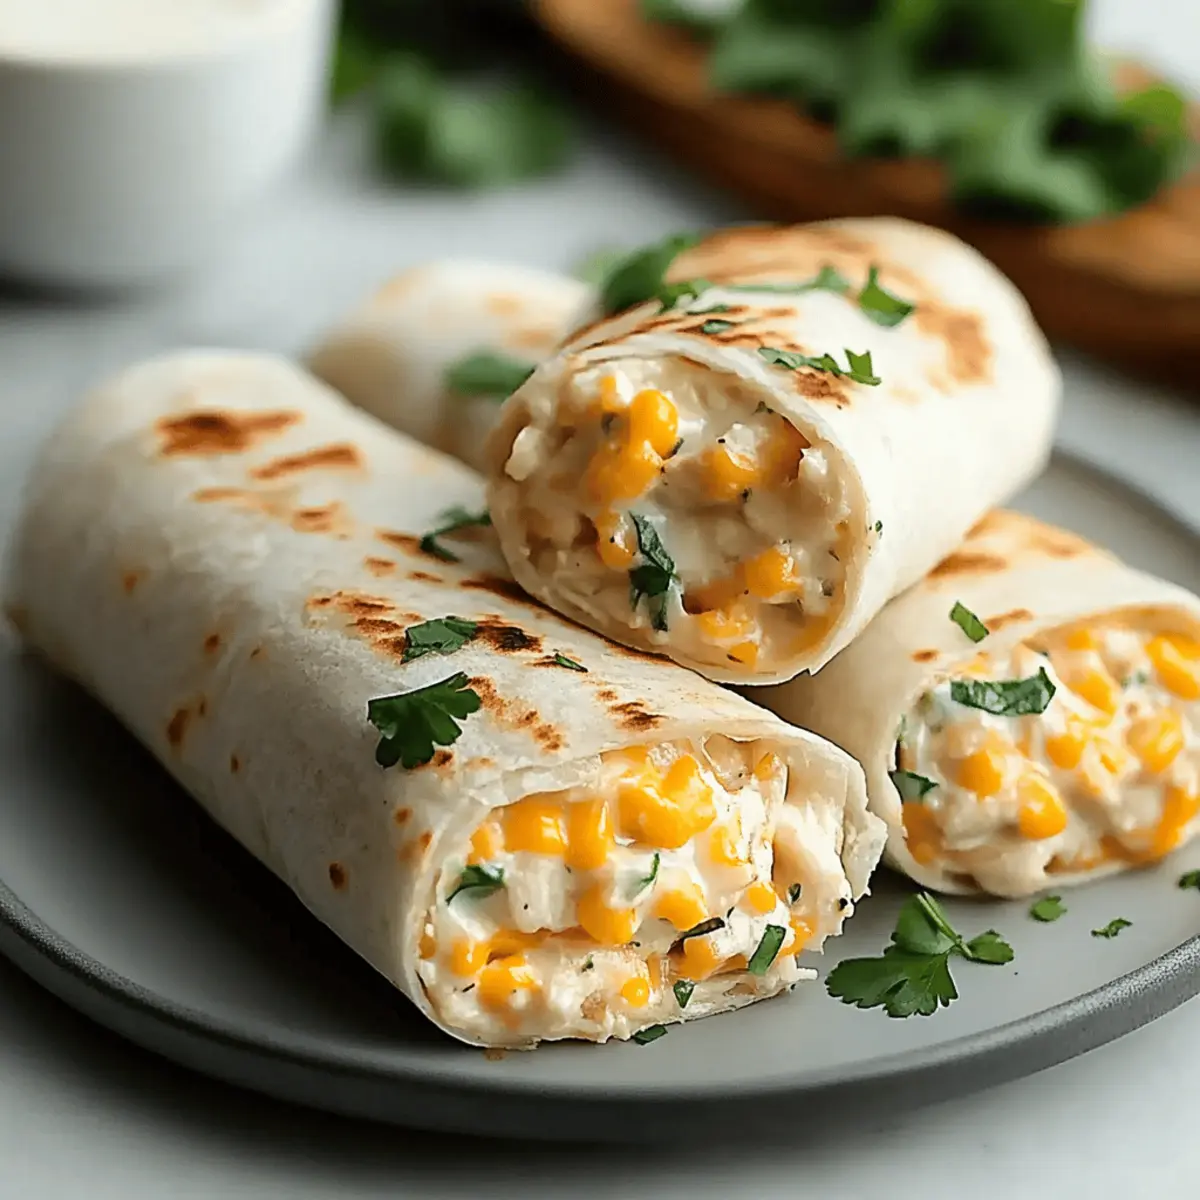
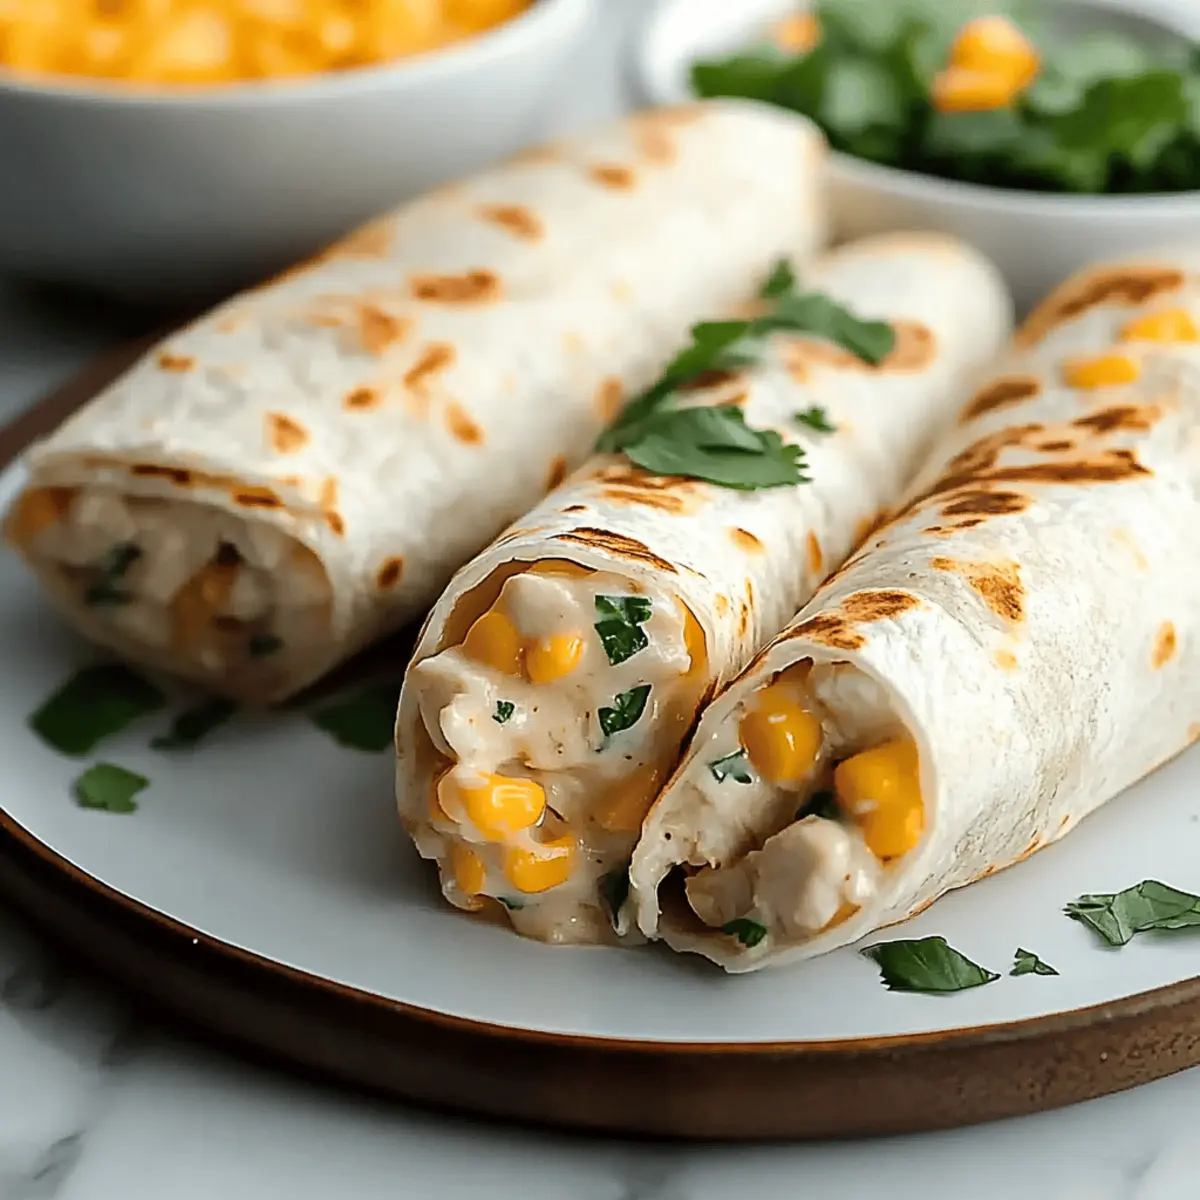
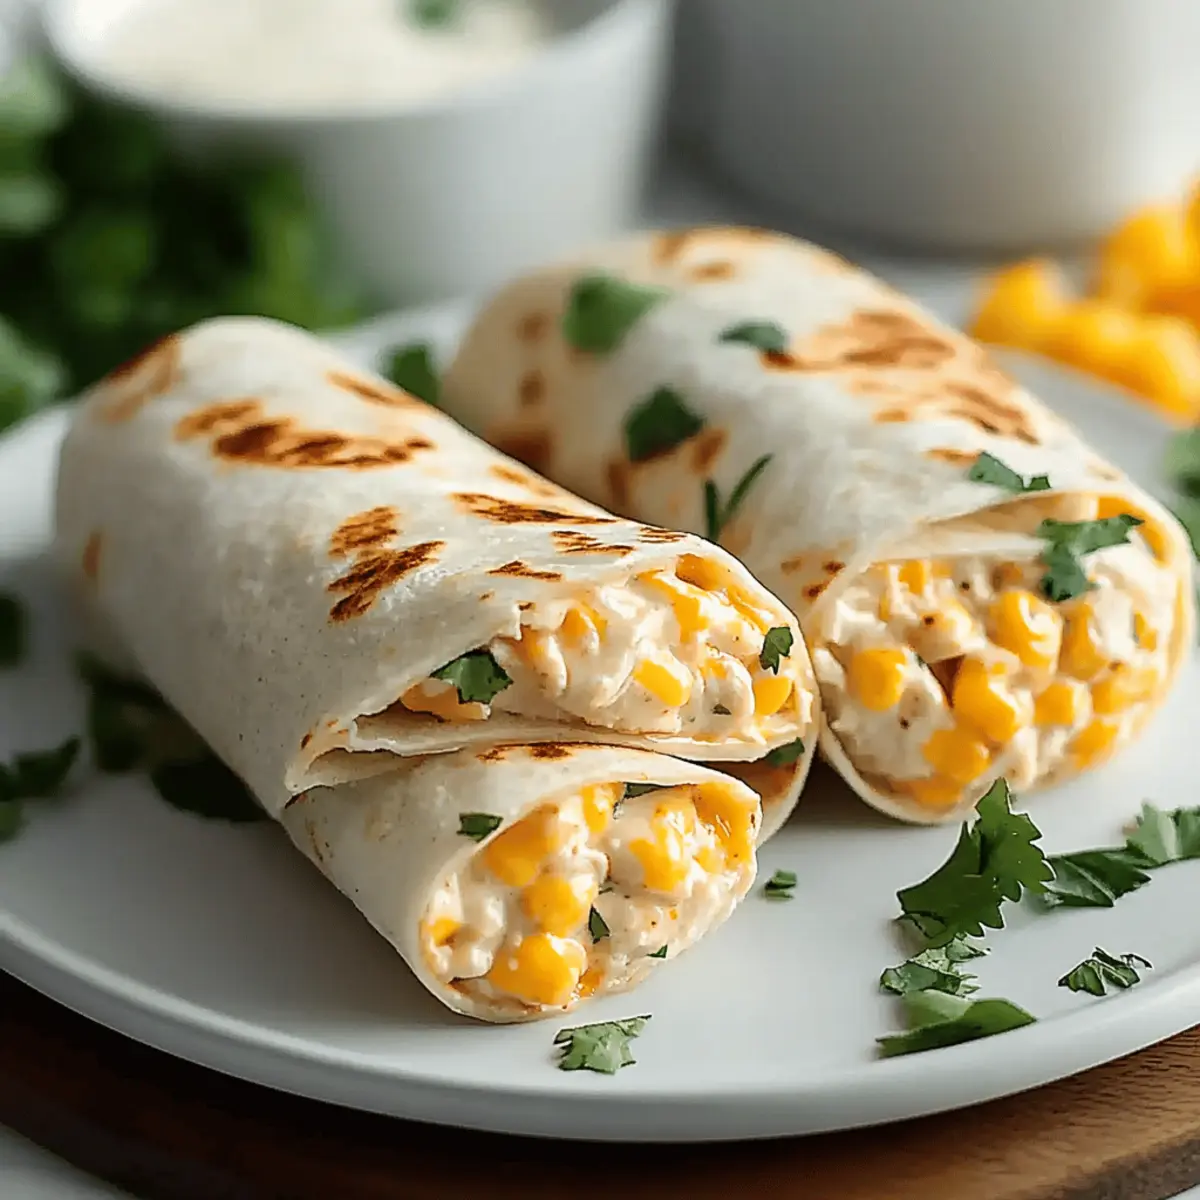
Lay your flour tortillas flat on a clean surface. Spoon a generous portion of the creamy garlic chicken mixture onto each tortilla, then sprinkle with your choice of shredded cheese. Be sure to leave a little room at the edges for rolling. Roll them up tightly, ensuring the filling is secured inside, ready to be sizzling and delicious.
Step 5: Sear the Wraps
Heat a skillet over medium heat and drizzle with olive oil. Carefully place the wrapped tortillas seam-side down into the hot skillet. Sear for about 3–4 minutes until golden and crispy on the bottom, then gently flip and repeat on the other side. This will give your Cheesy Garlic Chicken Wraps that delightful crunch that contrasts perfectly with the creamy filling.
Step 6: Serve and Enjoy
Once both sides are golden brown and crispy, remove the wraps from the skillet and let them rest for a minute. Slice them diagonally for an attractive presentation, and consider serving with a sprinkle of fresh parsley or a side of your favorite dipping sauce. These Cheesy Garlic Chicken Wraps are sure to become a family favorite!
Storage Tips for Cheesy Garlic Chicken Wraps
Fridge: Store leftover Cheesy Garlic Chicken Wraps in an airtight container for up to 3 days. This keeps them fresh and ready for a quick meal!
Freezer: To freeze, wrap the uncooked Cheesy Garlic Chicken Wraps tightly in plastic wrap and then in foil. They can be frozen for up to 2 months.
Reheating: When ready to enjoy, thaw the wraps overnight in the fridge. Reheat them in a skillet over medium heat for about 3-4 minutes on each side, or in the oven wrapped in foil at 350°F until heated through.
Make-Ahead: If you're prepping in advance, feel free to assemble and store your wraps without cooking. Just sear them right before serving for that fresh, crispy texture!
Cheesy Garlic Chicken Wraps Variations
Feel free to get creative and make these wraps your own with these delightful twists!
-
Spicy Kick: Add 1-2 tablespoons of your favorite hot sauce to the creamy garlic mixture for a zesty surprise. Each bite will delight your taste buds with added warmth.
-
Herb-Infused: Mix in fresh chopped herbs, like basil or parsley, for a garden-fresh flavor. This elevates the dish with vibrant, aromatic notes, making your wraps even more appealing.
-
Vegan Option: Substitute rotisserie chicken with grilled veggies and use a plant-based cream alternative. This way, you can still enjoy the creamy goodness without the meat!
-
Cheese Variety: Experiment with different cheeses such as feta or blue cheese for a unique flavor profile. Each cheese brings its own character, providing a new tasting experience every time.
-
Crunchy Texture: Add crispy bacon bits or toasted pine nuts inside the wraps for a satisfying crunch. This twist balances the creaminess perfectly and enhances the overall texture.
-
Protein Alternative: Use shredded turkey or cooked chickpeas instead of chicken for a different protein source. Both swaps add variety while keeping the dish hearty and wholesome.
-
Mexican Flare: Incorporate black beans and corn into the filling, and top with salsa for a fiesta vibe. These additions will transport your taste buds to a lively taco night!
With so many options, your Cheesy Garlic Chicken Wraps can transform into something new each time you make them! If you’re curious about more fabulous meal ideas, don’t miss my guide on quick weeknight meals and explore deliciously easy possibilities!
What to Serve with Cheesy Garlic Chicken Wraps?
When you're ready to create a delightful meal around your wraps, pair them with these delicious accompaniments.
-
Crisp Green Salad: A refreshing mix of greens adds a light contrast to the rich wraps, balancing flavors perfectly. Toss in a tangy vinaigrette for an extra zing.
-
Oven-Roasted Vegetables: Seasonal veggies like bell peppers, zucchini, and carrots bring vibrant colors and natural sweetness, complementing the savory chicken and garlic beautifully. The caramelization during roasting enhances their natural flavors.
-
Creamy Coleslaw: This classic side introduces a crunchy, tangy element, enhancing the wraps' creaminess while providing a satisfying texture.
-
Garlic Breadsticks: Double up on the garlic delight! These warm, buttery sticks have the same comforting flavor and are perfect for dipping in any leftover garlic sauce from the wraps.
-
Chilled Cucumber Soup: Refreshing and light, this chilled soup adds a cool contrast, making each bite of the wrap feel even more indulgent without being heavy.
-
Fruit Skewers: Add a hint of sweetness with fresh fruits like grapes, melon, and strawberries. Their natural juiciness can cleanse the palate between bites of rich, cheesy wraps.
-
Lemonade or Iced Tea: A cool beverage option enhances the overall dining experience. Both drinks provide a refreshing contrast to the savory flavors of your Cheesy Garlic Chicken Wraps.
Expert Tips for Cheesy Garlic Chicken Wraps
• Melted Perfection: Choose a cheese blend that melts well, like Cheddar and Mozzarella, for that gooey, comforting effect.
• Golden Garlic: Roast your garlic until it's completely soft and lightly browned; this is crucial for maximum flavor in your wraps.
• Crispy Wraps: Avoid flipping the wraps too soon while searing. Let them form a crust for that delightful crunch on the outside.
• Flavor Freedom: Feel free to spice things up! Incorporate jalapeños or hot sauce into the creamy garlic mixture for a zesty twist on your Cheesy Garlic Chicken Wraps.
• Portion Control: Roll the wraps tightly but not overly stuffed to ensure even cooking and ease of handling.
• Meal Prep Ready: Make a larger batch and freeze uncooked wraps. Thaw overnight and sear before serving for quick meals any day of the week!
Make Ahead Options
These Cheesy Garlic Chicken Wraps are perfect for meal prep enthusiasts looking to save time! You can roast the garlic and prepare the creamy sauce up to 24 hours in advance; simply refrigerate the sauce in an airtight container to maintain its rich flavor. Additionally, you can assemble the wraps and keep them wrapped in plastic wrap for up to 3 days in the fridge. When you're ready to serve, just pan-sear the wraps until golden and crispy, which will give you restaurant-quality results with minimal effort. This makes busy weeknights manageable while ensuring your family enjoys these delectable wraps!
Cheesy Garlic Chicken Wraps Recipe FAQs
What type of chicken should I use?
Absolutely! While rotisserie chicken makes for a quick and flavorful base, you can also use leftover cooked chicken or grilled chicken breast for your Cheesy Garlic Chicken Wraps. Just make sure whatever you choose is shredded or diced to allow easy wrapping and an even distribution of flavor.
How should I store leftovers?
For leftover Cheesy Garlic Chicken Wraps, store them in an airtight container in the fridge for up to 3 days. Make sure to let them cool to room temperature before sealing to maintain freshness!
Can I freeze these wraps?
Yes, you can freeze Cheesy Garlic Chicken Wraps! To freeze, wrap uncooked wraps tightly in plastic wrap and then in foil. They’ll stay fresh for up to 2 months. When you’re ready to enjoy, thaw them overnight in the fridge and sear them in a skillet for a crispy finish!
What if my garlic doesn’t roast properly?
If your garlic cloves are still firm after roasting, they likely need more time in the oven. Wrap them back up and check every 10 minutes until they’re soft and golden. Also, ensure you've drizzled enough olive oil; this helps them roast evenly and enhances the flavor.
Are there any dietary considerations I should note?
Absolutely! If you're cooking for someone with dietary restrictions, use gluten-free tortillas for those avoiding gluten. For dairy allergies, consider substituting heavy cream with coconut milk and using dairy-free cheese alternatives which melt well. Always check labels to ensure all ingredients are safe for your guests!
Irresistibly Cheesy Garlic Chicken Wraps You'll Love
Ingredients
Equipment
Method
- Preheat your oven to 350°F (175°C). Slice the tops off the garlic bulbs, drizzle them lightly with olive oil, and season with salt and pepper. Wrap them in foil and roast for about 30 minutes until golden and tender.
- Once the roasted garlic has slightly cooled, squeeze the soft cloves into a bowl and mash them into a smooth paste.
- In a medium skillet, melt 2 tablespoons of butter over medium heat. Stir in the mashed garlic paste and let it infuse for about 2 minutes. Gradually whisk in 1 cup of heavy cream and simmer until thickened, about 5–7 minutes.
- Lay your flour tortillas flat, spoon a portion of the creamy garlic chicken mixture onto each tortilla, sprinkle with cheese, roll them tightly, ensuring the filling is secured.
- Heat a skillet over medium heat and drizzle with olive oil. Place the wraps seam-side down into the hot skillet. Sear for about 3–4 minutes until golden, then flip and repeat on the other side.
- Once both sides are golden brown, remove the wraps, let them rest for a minute, slice diagonally, and serve with fresh parsley or a favorite dipping sauce.
Leave a Reply