
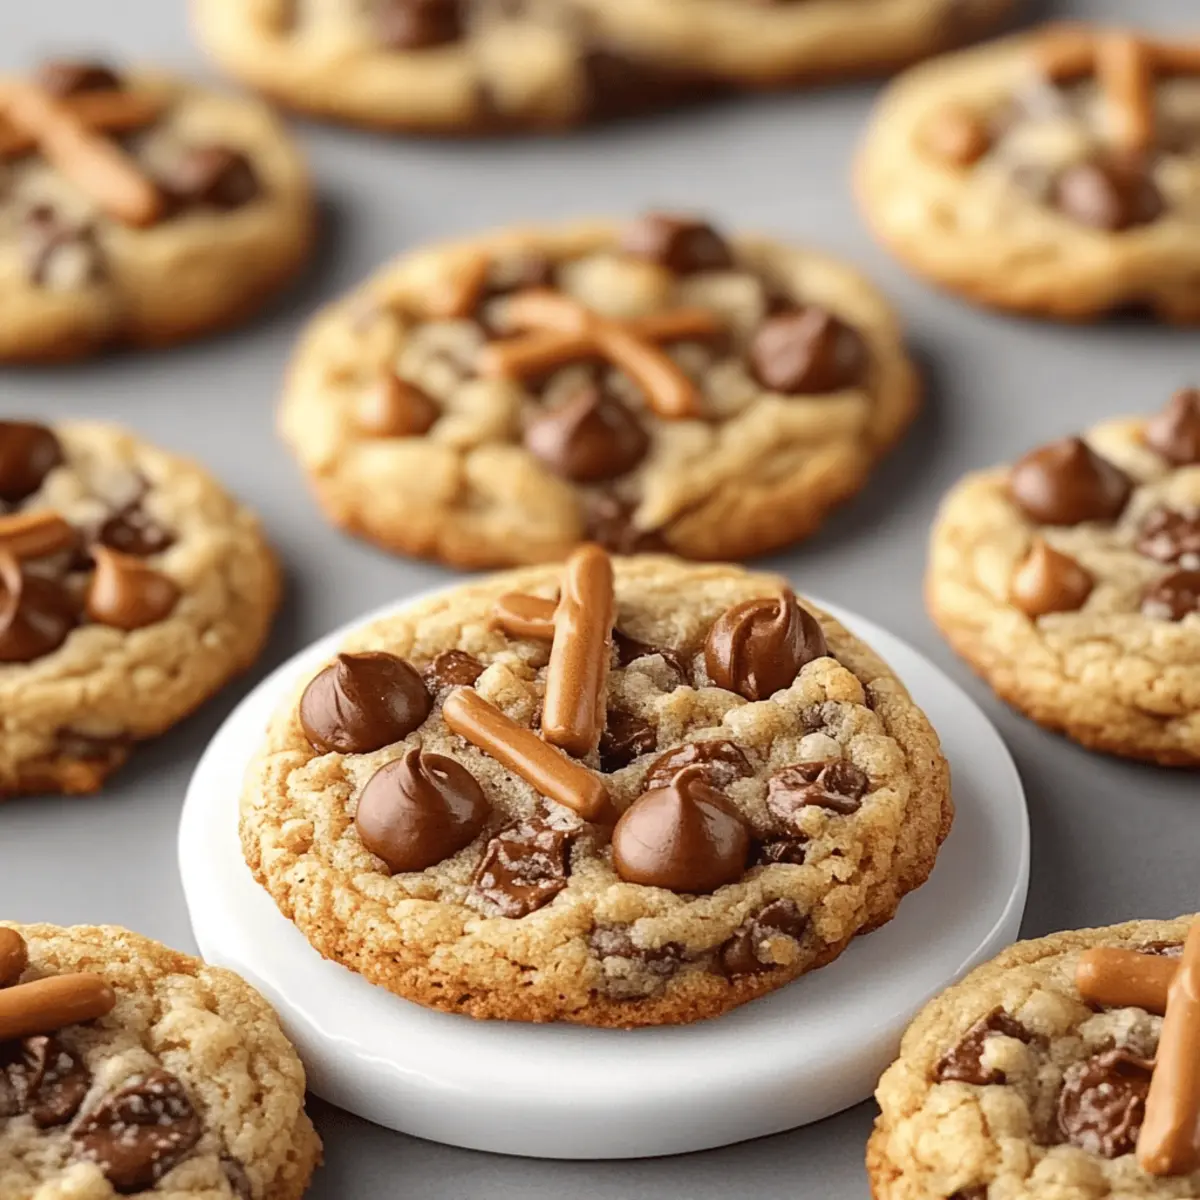
As I rummaged through my pantry one afternoon, I stumbled upon a delightful assortment of ingredients—chocolate chunks, pretzels, and caramel bits all vying for my attention. It hit me; I was about to create something special: Kitchen Sink Cookies! This flexible recipe allows you to unleash your creativity, making it perfect for those moments when you want a sweet treat that’s both indulgent and satisfying. Not only are these cookies a crowd-pleaser with their perfect mix of chewy, crunchy, and gooey textures, but they also come together in a flash! With the holidays approaching, why not bake a batch (or two) and share the joy? What secret ingredients will you toss into your own cookie experiment?

Why are Kitchen Sink Cookies so special?
Flexibility: This recipe encourages you to mix and match ingredients based on what you have on hand—think nuts, dried fruits, or even leftover candies!
Quick and Easy: Whipping up these cookies takes hardly any time, making them a perfect last-minute treat for unexpected guests.
Crowd-Pleaser: With their combination of flavors and textures, they’re sure to impress friends and family alike—perfect for gatherings!
Irresistible Gooeyness: The melted caramel bits create delightful pockets of gooey sweetness that will keep you coming back for more.
Satisfying Crunch: The pretzel pieces offer a splendid crunch that contrasts beautifully with the chewy cookie base, making each bite a delightful experience.
Creative Kitchen Adventure: These cookies invite you to explore your pantry and experiment, turning a simple recipe into a fun culinary adventure.
Kitchen Sink Cookies Ingredients
Unleash your creativity with these delightful Kitchen Sink Cookies!
For the Dough
- Butter – Provides richness and moisture; use unsalted for better salt control.
- Brown Sugar – Adds sweetness and chewiness; substitute with coconut sugar for deeper flavor.
- Granulated Sugar – Sweetens and helps structure the cookies; no substitution needed.
- Egg – Acts as a binder; replace with flax egg or applesauce for a vegan version.
- Vanilla Extract – Enhances flavors; always opt for pure extract for the best taste.
- Baking Soda – Provides leavening; ensure it’s fresh for optimal rise.
- All-Purpose Flour – Forms the cookie structure; can substitute with a gluten-free flour mix.
For the Mix-Ins
- Chocolate Chips (semi-sweet and milk) – Provide sweetness and meltiness; feel free to use dark or white chocolate instead.
- Pretzels – Add saltiness and crunch; any type of pretzel or even nuts can be substituted.
- Caramel Bits – Deliver gooey sweetness; chopped caramel squares work as an alternative.
This ingredient lineup makes for irresistible Kitchen Sink Cookies that everyone will adore!
Step‑by‑Step Instructions for Kitchen Sink Cookies
Step 1: Preheat the Oven
Begin by preheating your oven to 350°F (175°C). This ensures that your Kitchen Sink Cookies will bake evenly and develop that perfect golden color. While the oven heats, line a baking sheet with parchment paper, which will prevent the cookies from sticking and promote even baking.
Step 2: Melt the Butter
In a microwave-safe bowl, melt 1 cup of unsalted butter for about 30 seconds to 1 minute, watching closely to prevent overheating. Once melted, let the butter cool slightly so it’s warm but not scalding; this will help maintain the right texture in your cookies.
Step 3: Combine Sugars with Butter
Add 1 cup of packed brown sugar and ½ cup of granulated sugar into the melted butter, stirring gently with a whisk until the mixture is well combined and smooth. The sugars should dissolve into the butter, creating a thick, fudgy base that contributes to the cookies' chewiness.
Step 4: Mix in Egg and Vanilla
Crack in one large egg and pour in 2 teaspoons of pure vanilla extract, mixing until the batter becomes smooth and creamy. This mixture adds richness and flavor to the Kitchen Sink Cookies, creating a delightful balance with the sweet and salty mix-ins yet to be added.
Step 5: Add Baking Soda and Salt
Sprinkle in 1 teaspoon of baking soda and a pinch of salt, stirring until just combined. The baking soda will ensure your cookies rise properly, creating a desirable soft and chewy texture. Be careful not to overmix at this stage; you want to keep the dough airy and light.
Step 6: Incorporate the Flour
Fold in 2 ¼ cups of all-purpose flour until you see no dry spots remaining. The dough may feel sticky at this point, which is perfect for your Kitchen Sink Cookies, as it allows for easy incorporation of the flavorful mix-ins that follow.
Step 7: Add Chocolate Chips and Mix-ins
Gently stir in 1 cup of chocolate chips, 1 cup of crushed pretzels, and 1 cup of caramel bits. The combination of sweet chocolate, salty pretzels, and gooey caramel will create an irresistible flavor explosion in your Kitchen Sink Cookies that everyone will love.
Step 8: Portion and Shape the Dough
Using a ¼-cup measuring cup, scoop out portions of the dough and roll them into balls. Then, flatten each ball slightly, giving them a rustic appearance. This shaping will help the cookies bake evenly, resulting in a delightful chewy center and slightly crispy edges.
Step 9: Bake the Cookies
Place the shaped dough on your prepared baking sheet, leaving enough space between each cookie for spreading. Bake in your preheated oven for 12-14 minutes, or until golden around the edges yet soft in the center. They will continue to firm up as they cool.
Step 10: Cool Before Serving
Once baked, let your Kitchen Sink Cookies cool on the baking sheet for 10-15 minutes. This cooling period allows the cookies to set, achieving the perfect texture and making them easier to transfer to a wire rack for further cooling.

Make Ahead Options
These Kitchen Sink Cookies are perfect for meal prep enthusiasts! You can prepare the cookie dough up to 24 hours in advance by mixing all the ingredients, shaping them into balls, and storing them in an airtight container in the refrigerator. This not only saves time but also allows the flavors to meld beautifully, resulting in even tastier cookies. If you want to go a step further, you can freeze the dough balls for up to 3 months. Just remember to bake them directly from the freezer, adding a couple of extra minutes to the baking time. When it's time to enjoy your cookies, simply bake them as directed, and you'll have warm, delicious Kitchen Sink Cookies ready to wow your family or guests!
Kitchen Sink Cookie Variations
Feel free to unleash your creativity with these Kitchen Sink Cookies and tailor them to your tastes!
-
Dried Fruit: Swap out chocolate chips for your favorite dried fruits like cranberries or apricots for a sweeter, chewier twist.
Think about how the tartness from dried cranberries would dance with the sweet caramel bits in every bite! -
Nutty Goodness: Mix in chopped nuts such as walnuts, pecans, or almonds for an extra crunch.
The addition of nuts will provide a lovely texture that complements the chewy cookie base perfectly. -
Cocoa Powder: Add ¼ cup of cocoa powder to the flour for a chocolatey version of these cookies.
Just imagine sinking your teeth into a rich chocolate cookie filled with gooey caramel and crunchy pretzels! -
Spicy Kick: Toss in a pinch of cinnamon or a dash of cayenne pepper for a surprising heat that contrasts with the sweetness.
The warm spice will elevate the flavor profile, making each bite even more exciting! -
Peanut Butter: Substitute caramel bits with peanut butter chips or add a swirl of peanut butter for rich creaminess.
The combination of sweet and nutty will create a beautiful balance, making them irresistible! -
Gluten-Free: Use a gluten-free flour blend instead of all-purpose flour to make these cookies gluten-free.
This way, everyone can enjoy the delightful taste and texture of Kitchen Sink Cookies without worry! -
S'mores Twist: Incorporate mini marshmallows and crushed graham crackers for a fun s'mores-inspired cookie.
Imagine the flavor explosion as melted marshmallows meet sweet chocolate and crunchy pretzels!
Feel inspired? Explore these variations and mix in what you love most. Don't forget to invite friends and family to share the joy of your delicious creations! If you’re looking for more sweet inspiration, check out my article on how to store your cookies. Happy baking!
Expert Tips for Kitchen Sink Cookies
- Rest the Dough: Allow the cookie dough to rest for about 30 minutes before baking. This enhances the texture, creating chewier Kitchen Sink Cookies.
- Ingredient Temperature: Ensure all ingredients are at room temperature for even mixing and consistent baking results.
- Butter Melting: Don’t over-melt the butter; it should be warm, not hot, to prevent greasy cookies.
- Cookie Shape: If your cookies come out misshaped, reshape them right after baking for a more appealing look.
- Storage Secrets: To keep your cookies fresh, store them in an airtight container at room temperature, and consider freezing any excess dough for later use!
What to Serve with Kitchen Sink Cookies
Enhance your cookie experience with these delightful pairings that evoke warmth and joy for any occasion.
-
Cold Glass of Milk: Enjoy the classic pairing that brings out the sweetness in the cookies while providing a refreshing contrast.
-
Rich Coffee: A bold cup of coffee complements the sugary richness of the cookies, creating a warm, cozy moment perfect for savouring.
-
Vanilla Ice Cream: Serve a scoop beside these cookies for an irresistible treat that balances the chewy textures with creamy decadence. The combination will have you swooning with delight!
-
Fresh Fruit Salad: The bright and zesty flavors of a fruit salad offset the richness of the cookies, adding a refreshing touch to your dessert table.
-
Chocolate Sauce Drizzle: A decadent drizzle of melted chocolate or caramel around the plate elevates the presentation and adds extra indulgence to each bite.
-
Hot Cocoa: Wrap yourself in comfort with a steaming mug of hot cocoa, perfectly complementing the sweet and salty flavors of your Kitchen Sink Cookies.
-
Savory Cheese Platter: A selection of creamy and tangy cheeses juxtaposes the sweetness of the cookies, creating a sophisticated treat that excites your palate.
-
Spiced Chai Tea: The warm spices in a cup of chai infuse your cookie enjoyment with a cozy warmth, perfect for chilly afternoons.
-
Peanut Butter Dip: A rich peanut butter dip engages the senses with its creamy texture, making each bite of cookie a new adventure.
-
Chocolate Milkshake: Indulge in a thick chocolate milkshake that amplifies the dessert experience, making it a decadent treat for any sweet tooth.
How to Store and Freeze Kitchen Sink Cookies
Room Temperature: Keep your Kitchen Sink Cookies in an airtight container at room temperature for up to 3-4 days to maintain their freshness and chewy texture.
Fridge: If you need them to last a bit longer, you can refrigerate the cookies for up to a week, ensuring they are well-wrapped to prevent drying out.
Freezer: For longer-term storage, freeze the cookie dough balls on a baking sheet until solid, then transfer them to a freezer bag. They'll keep well for up to 3 months.
Reheating: To enjoy frozen cookies, bake them directly from the freezer for an extra couple of minutes. Warm them up in the microwave for about 10-15 seconds for a delightful gooey experience.

Kitchen Sink Cookies Recipe FAQs
What is the best way to select ripe ingredients for Kitchen Sink Cookies?
Absolutely! When choosing ingredients for your Kitchen Sink Cookies, focus on quality for the best results. For butter, pick unsalted for better control over the cookie's saltiness. If you’re adding chocolate, opt for high-quality chocolate chips or chunks to ensure rich flavor. For the pretzels, look for ones that are crunchy without any dark spots—they should be fresh to maintain that delightful crunch!
How should I store Kitchen Sink Cookies to keep them fresh?
To keep your Kitchen Sink Cookies fresh, store them in an airtight container at room temperature for up to 3-4 days. If you want to prolong their deliciousness, you can refrigerate them, but be sure to wrap them tightly to prevent drying out. For extra longevity, freeze them! Just place the cookies in a freezer-safe bag with some air removed, and they can last for about 3 months.
Can I freeze the cookie dough for later use?
Absolutely! Freezing the dough is a fantastic idea. Once you’ve mixed your dough, scoop it into cookie-sized balls and place them on a baking sheet lined with parchment paper. Freeze the balls until solid (about 1 to 2 hours), then transfer them to a freezer bag or container. When you’re ready to bake, you can pop them straight from the freezer into the oven, just adding a couple of minutes to the baking time!
What should I do if my cookies spread too much while baking?
Very good question! If your Kitchen Sink Cookies spread too much, it could be due to overly melted butter or not enough flour. To rectify this next time, ensure the butter is just melted—not hot—and consider chilling the dough for 30 minutes before baking. Also, measure your flour correctly—spoon it into the measuring cup and level it off to avoid using too little, which can affect the structure.
Are there any dietary considerations I should be aware of with Kitchen Sink Cookies?
Indeed! As you experiment with your Kitchen Sink Cookies, keep any potential allergies in mind. If you have nut allergies, you can easily swap out nuts for additional chocolate, pretzels, or seeds. For a vegan version, use a flax egg or applesauce instead of a regular egg, and double-check that any chocolate chips or mix-ins are dairy-free. Always read the labels of your ingredients to ensure they’re suitable for your dietary needs!
Irresistibly Chewy Kitchen Sink Cookies for Sweet Cravings
Ingredients
Equipment
Method
- Preheat your oven to 350°F (175°C) and line a baking sheet with parchment paper.
- Melt 1 cup of unsalted butter for about 30 seconds to 1 minute.
- Combine the melted butter with 1 cup of brown sugar and ½ cup of granulated sugar.
- Mix in 1 large egg and 2 teaspoons of vanilla extract until smooth.
- Add 1 teaspoon of baking soda and a pinch of salt, and stir until just combined.
- Fold in 2 ¼ cups of all-purpose flour until no dry spots remain.
- Stir in 1 cup of chocolate chips, 1 cup of crushed pretzels, and 1 cup of caramel bits.
- Scoop portions of dough with a ¼-cup measuring cup and roll into balls, then flatten slightly.
- Bake for 12-14 minutes or until edges are golden and centers are soft.
- Cool on the baking sheet for 10-15 minutes before transferring to a wire rack.


Leave a Reply