
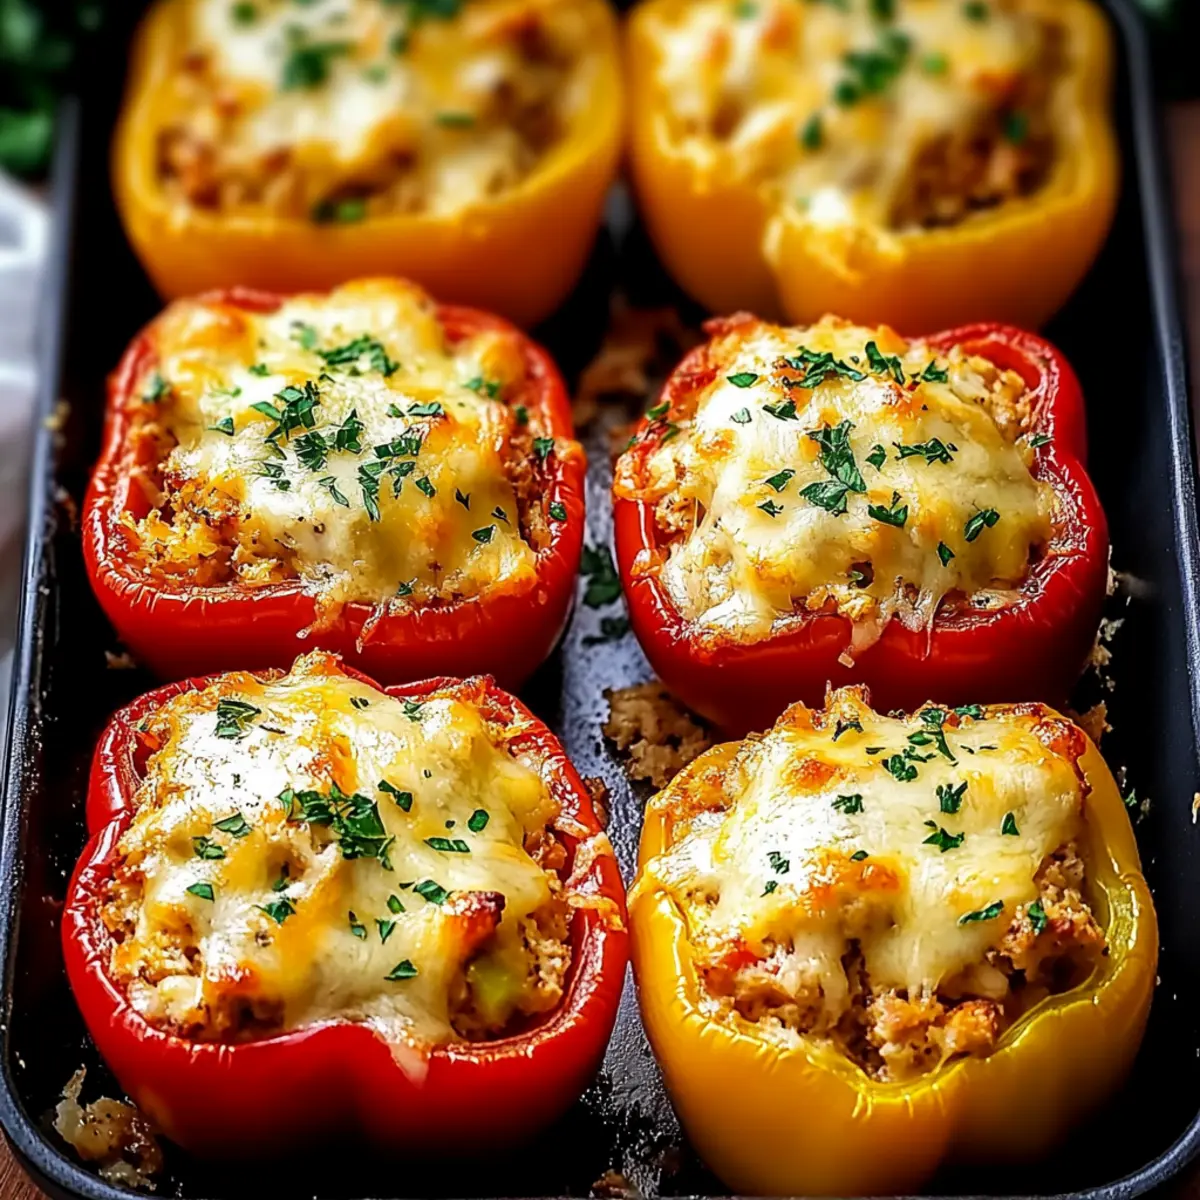
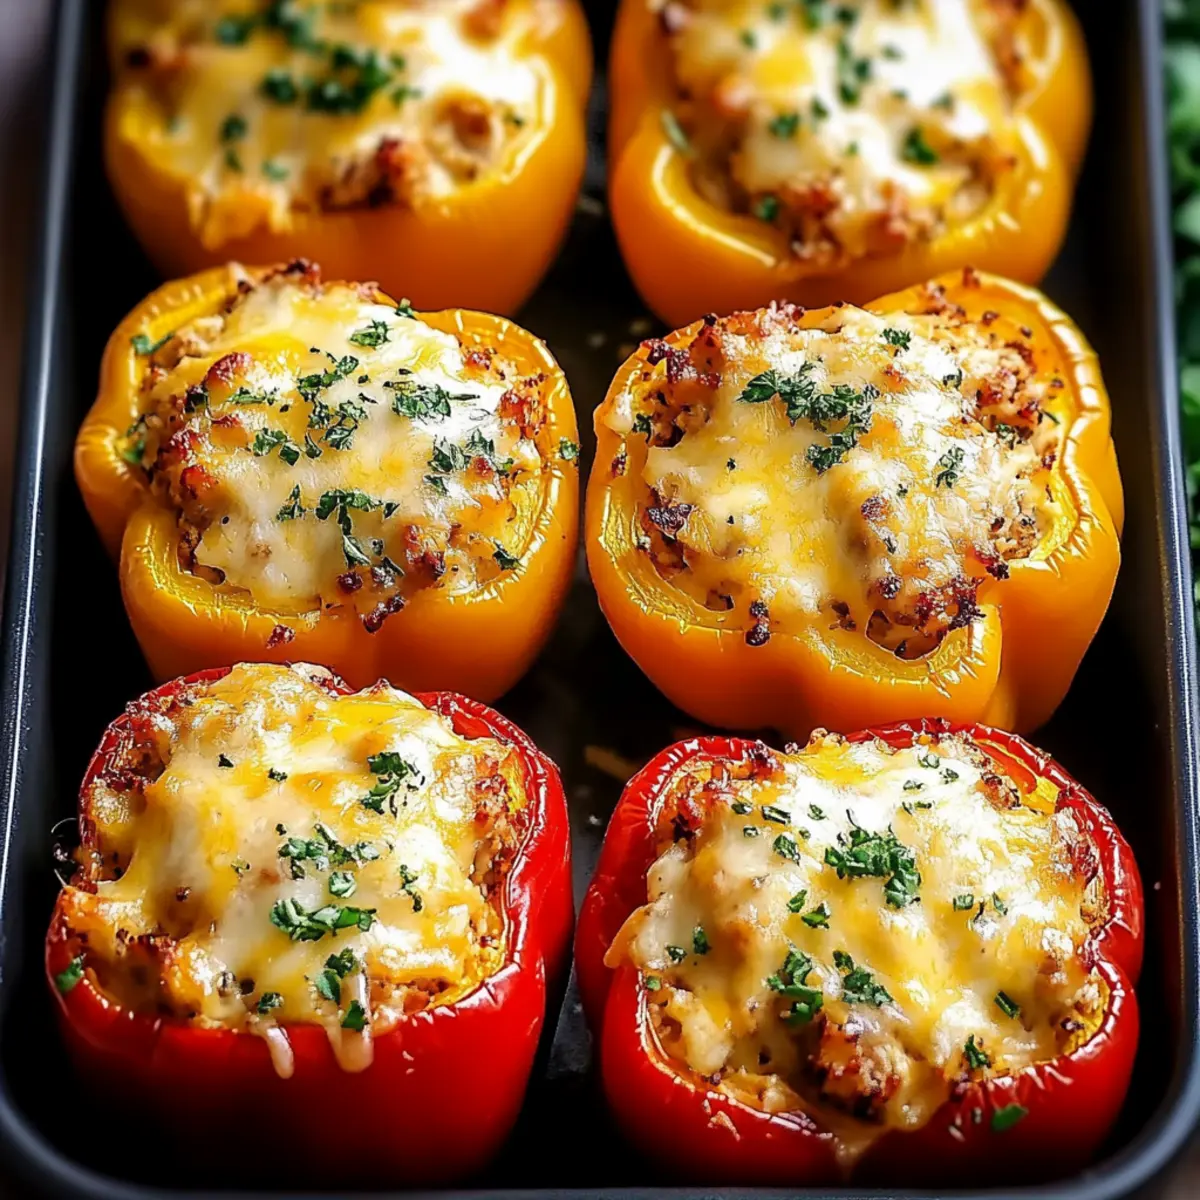
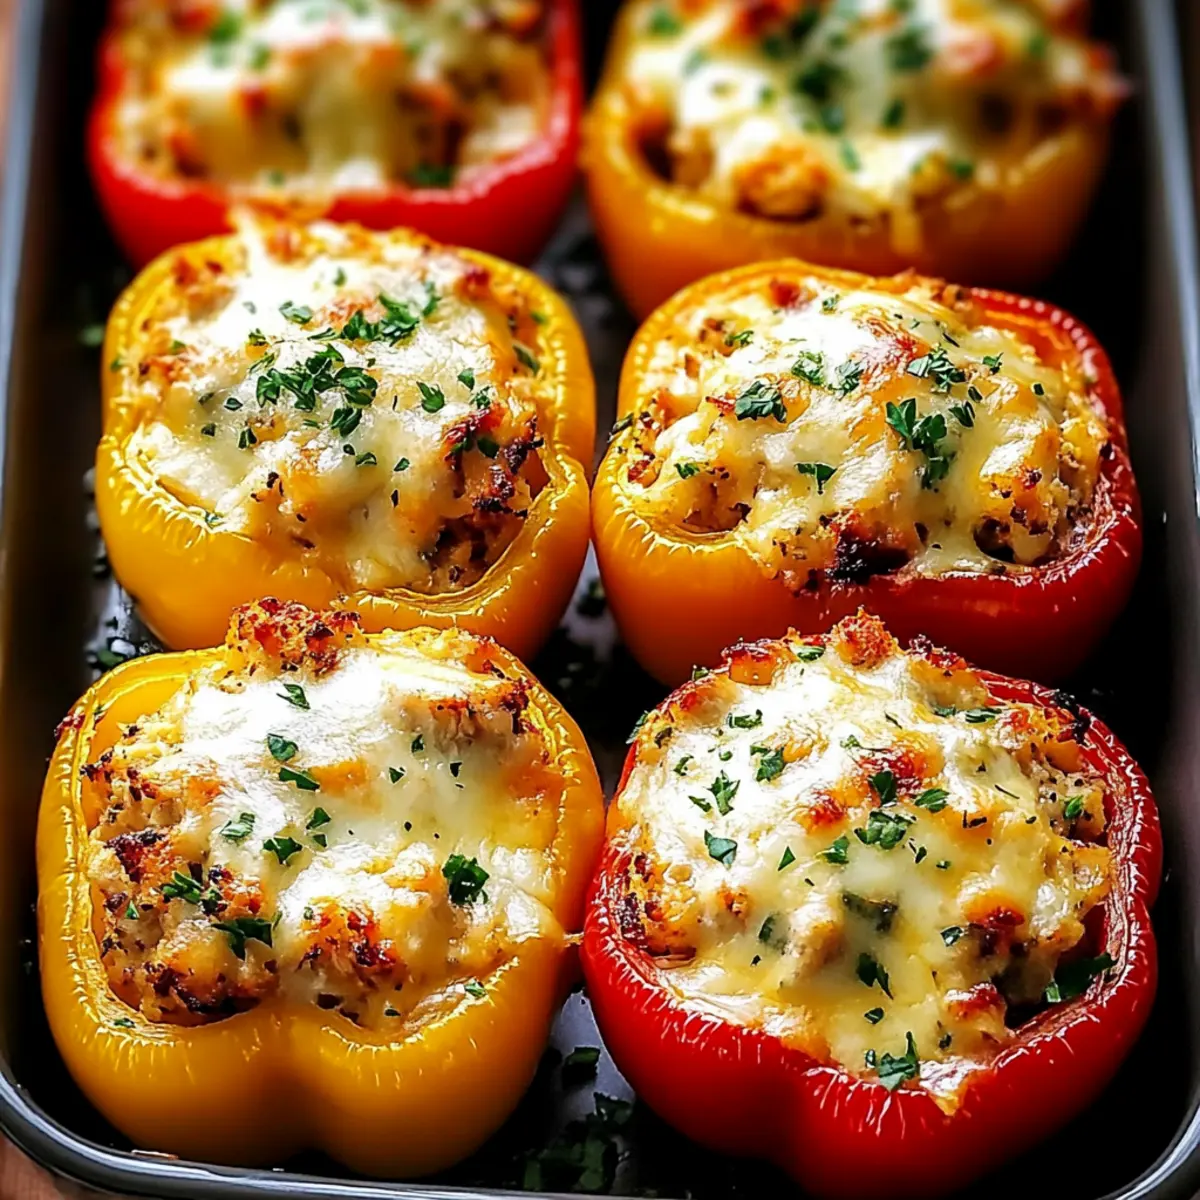
As I pulled back the foil and inhaled the warm, savory aroma filling my kitchen, I couldn't help but feel a wave of comfort wash over me. There's something downright delightful about Cheesy Chicken Stuffed Peppers, where succulent rotisserie chicken meets vibrant bell peppers and melty cheese. Not only does this dish bring a nutritious punch to the table, but it also offers a customizable canvas for your culinary creativity. Whether hosting a family dinner or simply nourishing yourself, these stuffed peppers are a crowd-pleaser that won't let you down. Best of all, they come together in a snap, allowing you to savor the satisfaction of a homemade meal without the fuss. Ready to explore the delicious variations you can whip up? Let’s dive into this flavorful adventure!
Why Are Cheesy Chicken Stuffed Peppers Amazing?
Simplicity At Its Finest: The straightforward preparation means anyone can whip these up, whether you're a busy parent or a novice cook.
Nutritious & Filling: Packed with protein-rich chicken and colorful veggies, they make a balanced meal that will satisfy your hunger without the guilt.
Customizable Flavor: Feel free to swap ingredients based on your preference—try different cheeses, grains like quinoa, or even seasonal veggies to keep it exciting.
Crowd-Pleasing Appeal: Perfect for gatherings, they delight both kids and adults, ensuring smiles all around. Pair with a side salad or a bowl of soup for a complete feast!
Quick Cook Time: You can enjoy this delicious dish in about an hour, making it ideal for weeknight dinners. If you love chicken, check out our Chicken Stuffing Bake for another hit!
Cheesy Chicken Stuffed Peppers Ingredients
• Dive into the world of flavor!
For the Filling
- Bell Peppers – Choose vibrant colors for a beautiful presentation; you can also use zucchini as a base.
- Rotisserie Chicken – This is your protein-packed star; substitute with cooked turkey or shredded tofu for a veggie option.
- Shallots – These add a mild, sweet onion flavor; yellow onion or leeks are great alternatives if needed.
- Garlic – Fresh or powdered, it enhances the richness of the dish; use what you have on hand.
- Broccoli – Adds crunch and nutrition; swap in spinach or kale for a different green twist.
- Rice – Cooked rice serves as a hearty texture; quinoa, brown rice, or even couscous are fantastic substitutes.
- Cheddar & Mozzarella Cheese – Together, they create that gooey goodness; consider using Monterey Jack or Gouda for a flavor twist.
- Chicken Broth – Keeps everything moist and flavorful; vegetable broth works well for a lighter alternative.
- Seasonings (Salt, Pepper, Italian Herbs) – These elevate all flavors; adjust based on your taste preferences.
Enjoy crafting your Cheesy Chicken Stuffed Peppers while exploring endless delicious variations!
Step‑by‑Step Instructions for Cheesy Chicken Stuffed Peppers
Step 1: Preheat the Oven
Begin by preheating your oven to 400°F (200°C). This temperature is perfect for ensuring that your Cheesy Chicken Stuffed Peppers cook evenly and become wonderfully tender. While the oven warms up, you can prepare your peppers, which will be ready to hold all that delicious filling.
Step 2: Prepare the Bell Peppers
Carefully slice the bell peppers in half lengthwise, removing the seeds and white pith to create ideal vessels for your filling. Arrange the pepper halves cut-side-up in a large baking dish, ensuring they fit snugly to prevent tipping during baking. Their vibrant colors will make your dish inviting and appetizing!
Step 3: Sauté the Aromatics
In a large skillet, heat a drizzle of olive oil over medium heat. Add the minced shallots and sauté for about 3-4 minutes until they turn translucent and aromatic. Then, stir in the minced garlic and chopped broccoli, cooking until the broccoli is a bright green, roughly 2-3 more minutes. This step builds a flavorful base for your Cheesy Chicken Stuffed Peppers.
Step 4: Combine the Filling Ingredients
Next, add the shredded rotisserie chicken, cooked rice, and your choice of seasonings to the skillet. Mix everything thoroughly for about 2-3 minutes, allowing the flavors to meld together beautifully. If the mixture feels a bit dry, you can splash in a bit of chicken broth to add moisture, ensuring a delightful filling.
Step 5: Add Cheese and Moisture
Incorporate half of the shredded cheddar and mozzarella cheese into the filling mixture, stirring until evenly combined. The cheese will enhance the creamy texture and flavor of your stuffing. If your mixture seems thick, drizzle in more chicken broth to achieve a consistency that’s easily spoonable but not too runny.
Step 6: Fill the Peppers Generously
Spoon the prepared filling generously into each bell pepper half, packing it in tightly to make the most of each vibrant shell. Once filled, top each pepper with the remaining cheese, allowing it to melt and create a deliciously gooey layer on top as they bake.
Step 7: Bake the Stuffed Peppers
Cover the baking dish with aluminum foil to lock in moisture and place it in the preheated oven. Bake for approximately 30 minutes. This step ensures the peppers become tender while allowing the filling to heat through beautifully, creating a delightful blend of flavors.
Step 8: Uncover and Finish Baking
After 30 minutes, carefully remove the foil from the baking dish to reveal the Cheesy Chicken Stuffed Peppers. Bake for an additional 15 minutes, or until the cheese is bubbly and golden brown. The final bake will add an appetizing crust to your dish, making it all the more enticing!
Step 9: Serve and Enjoy
Once done, take the stuffed peppers out of the oven and let them cool slightly before serving. Their vibrant colors and melted cheese are sure to impress everyone at your table. Pair the Cheesy Chicken Stuffed Peppers with a fresh side salad or a warm bowl of soup for a complete and hearty meal!

Cheesy Chicken Stuffed Peppers Variations
Feel free to play around with these suggestions and make this dish your own!
-
Dairy-Free: Swap the cheese for vegan alternatives like cashew cheese or dairy-free mozzarella for a creamy texture without the dairy.
-
Grain-Free: Use cauliflower rice instead of traditional grains for a low-carb and nutritious option that keeps it light yet satisfying.
-
Spicy Kick: Add diced jalapeños or a sprinkle of red pepper flakes to the filling for a flavorful heat that will awaken your taste buds.
-
Mediterranean Twist: Incorporate olives, feta cheese, and sun-dried tomatoes for a Mediterranean flavor explosion that changes the dish’s entire personality!
-
Filled with Beans: Mix in black beans or chickpeas to boost protein and add a hearty element that complements the chicken perfectly.
-
Herb-Infused: Experiment with fresh herbs like basil or cilantro in the filling to give your peppers an aromatic enhancement that's bursting with freshness.
-
Nutty Texture: Top the peppers with crushed nuts like pistachios or almonds before baking for a delightful crunch that contrasts beautifully with the soft filling.
-
Global Flavors: Incorporate spices like curry powder or smoked paprika into the filling for an exotic twist that takes your Cheesy Chicken Stuffed Peppers to new culinary heights.
What to Serve with Cheesy Chicken Stuffed Peppers
A delightful meal deserves equally delightful pairings, and your Cheesy Chicken Stuffed Peppers are no exception!
- Crisp Green Salad: A fresh salad with mixed greens and a tangy vinaigrette adds crunch and balances the rich flavors of the peppers.
- Garlic Bread: Warm, buttery garlic bread complements the cheesy filling, offering a satisfying texture contrast with every bite.
- Roasted Veggies: Seasonal roasted vegetables enhance the meal’s healthiness while introducing depth and variety to the plate.
- Quinoa Salad: A light quinoa salad with cucumber and cherry tomatoes offers extra protein and a refreshing taste that pairs beautifully.
- Creamy Coleslaw: The cool creaminess of coleslaw provides a contrasting texture that perfectly balances the savory stuffed peppers.
- Chilled White Wine: A glass of chilled Sauvignon Blanc can elevate your dining experience, cutting through the richness with its crisp acidity.
- Homemade Tomato Soup: Serve alongside a bowl of warm tomato soup for a comforting duo that feels like a hug in a bowl.
- Fruit Sorbet: Finish off your meal with a scoop of fruit sorbet to cleanse the palate and add a sweet note after the savory main dish.
Make Ahead Options
These Cheesy Chicken Stuffed Peppers are perfect for meal prep enthusiasts! You can prepare the filling (shredded chicken, rice, veggies, and cheese) up to 24 hours in advance. Simply mix everything, refrigerate in an airtight container, and keep the bell peppers whole until you're ready to assemble. This prevents the peppers from becoming soggy. When you're ready to serve, fill the peppers with the prepared mixture, top with cheese, and bake according to your original recipe instructions. In just over 45 minutes, you’ll have a comforting meal that feels fresh and flavorful, giving you a delicious dinner with minimal effort!
How to Store and Freeze Cheesy Chicken Stuffed Peppers
Room Temperature: Store any leftovers at room temperature for no more than 2 hours to ensure food safety.
Fridge: Keep Cheesy Chicken Stuffed Peppers in an airtight container in the fridge for up to 3 days. To reheat, place them in the oven at 350°F (175°C) for about 20 minutes or until heated through.
Freezer: These peppers can be frozen for up to 2 months. Wrap each stuffed pepper tightly in plastic wrap and then place them in a freezer-safe bag or container. When ready to eat, thaw overnight in the fridge before reheating.
Reheating: For the best taste and texture, reheat in the oven at 350°F (175°C) for 20 minutes, ensuring they’re warmed to your liking.
Expert Tips for Cheesy Chicken Stuffed Peppers
- Slice Peppers Evenly: Ensure that you cut the bell peppers in half uniformly to allow for even cooking, ensuring a tender texture for your Cheesy Chicken Stuffed Peppers.
- Mix Your Cheeses: Combining different cheeses creates a rich flavor profile. Try blending cheddar and mozzarella for optimal gooeyness, or explore Monterey Jack for a unique taste!
- Watch the Moisture: Start with less chicken broth when mixing the filling; you can always add more if needed. This helps prevent soggy peppers while preserving deliciousness.
- Cover While Baking: Initially covering the baking dish with foil traps steam, leading to perfectly tender peppers. Remove the foil towards the end for that golden cheese topping!
- Add Extra Veggies: Don’t hesitate to incorporate seasonal vegetables or beans for added nutrition and texture. This makes your Cheesy Chicken Stuffed Peppers even more customizable and wholesome!
Cheesy Chicken Stuffed Peppers Recipe FAQs
How do I choose the best bell peppers for stuffing?
Absolutely! Look for bell peppers that are firm, with smooth skin and no dark spots or blemishes. Choose a variety of colors for a vibrant presentation. The peppers should feel heavy for their size, indicating freshness. If they’re starting to wrinkle, it’s time to pass on those!
How should I store leftover cheesy chicken stuffed peppers?
To keep your leftovers fresh, store them in an airtight container in the refrigerator for up to 3 days. If you notice any moisture, place a paper towel inside the container to absorb it. This will help maintain their texture and flavor.
Can I freeze cheesy chicken stuffed peppers?
Very! To freeze, place your stuffed peppers in a freezer-safe dish and cover them tightly with plastic wrap or aluminum foil. They can be stored for up to 2 months. When you’re ready to enjoy them, thaw overnight in the fridge and bake at 350°F (175°C) for about 20-25 minutes to reheat.
What if I made too much filling?
No worries! If you have extra filling, you can use it in various ways. Consider mixing it into a salad, using it as a topping for baked potatoes, or even creating a quesadilla filling. Alternatively, store the extra filling in an airtight container and keep it in the fridge for up to 3 days.
Are these cheesy chicken stuffed peppers suitable for people with allergies?
Absolutely! This recipe is highly customizable, so if you have specific dietary restrictions, you can swap out ingredients. For those allergic to dairy, use vegan cheese or simply omit it. For gluten-free diets, ensure the broth and rice are gluten-free. Just check all labels when necessary!
Can I use raw chicken instead of rotisserie chicken?
Yes, indeed! If using raw chicken, try to use shredded cooked chicken for extra flavor. Cook it thoroughly first, either by poaching or roasting, before shredding. You can infuse the chicken with seasonings to deepen the flavor profile of the stuffing. Just make sure it’s fully cooked before adding it to your peppers!
Cheesy Chicken Stuffed Peppers: Easy Comfort Food Delight
Ingredients
Equipment
Method
- Preheat your oven to 400°F (200°C) and grease a baking dish.
- Halve the bell peppers lengthwise, remove seeds, and arrange cut-side-up in the baking dish.
- Sauté shallots in a large skillet over medium heat until translucent, then add garlic and broccoli, and cook until bright green.
- Mix shredded chicken, cooked rice, and seasonings into the skillet; add broth if mixture seems dry.
- Incorporate half of the cheese into the chicken mixture.
- Stuff each pepper half with the chicken mixture and top with remaining cheese.
- Cover the baking dish with foil and bake for 30 minutes.
- Remove foil and bake uncovered for an additional 15 minutes until cheese is bubbly and golden brown.
Leave a Reply