
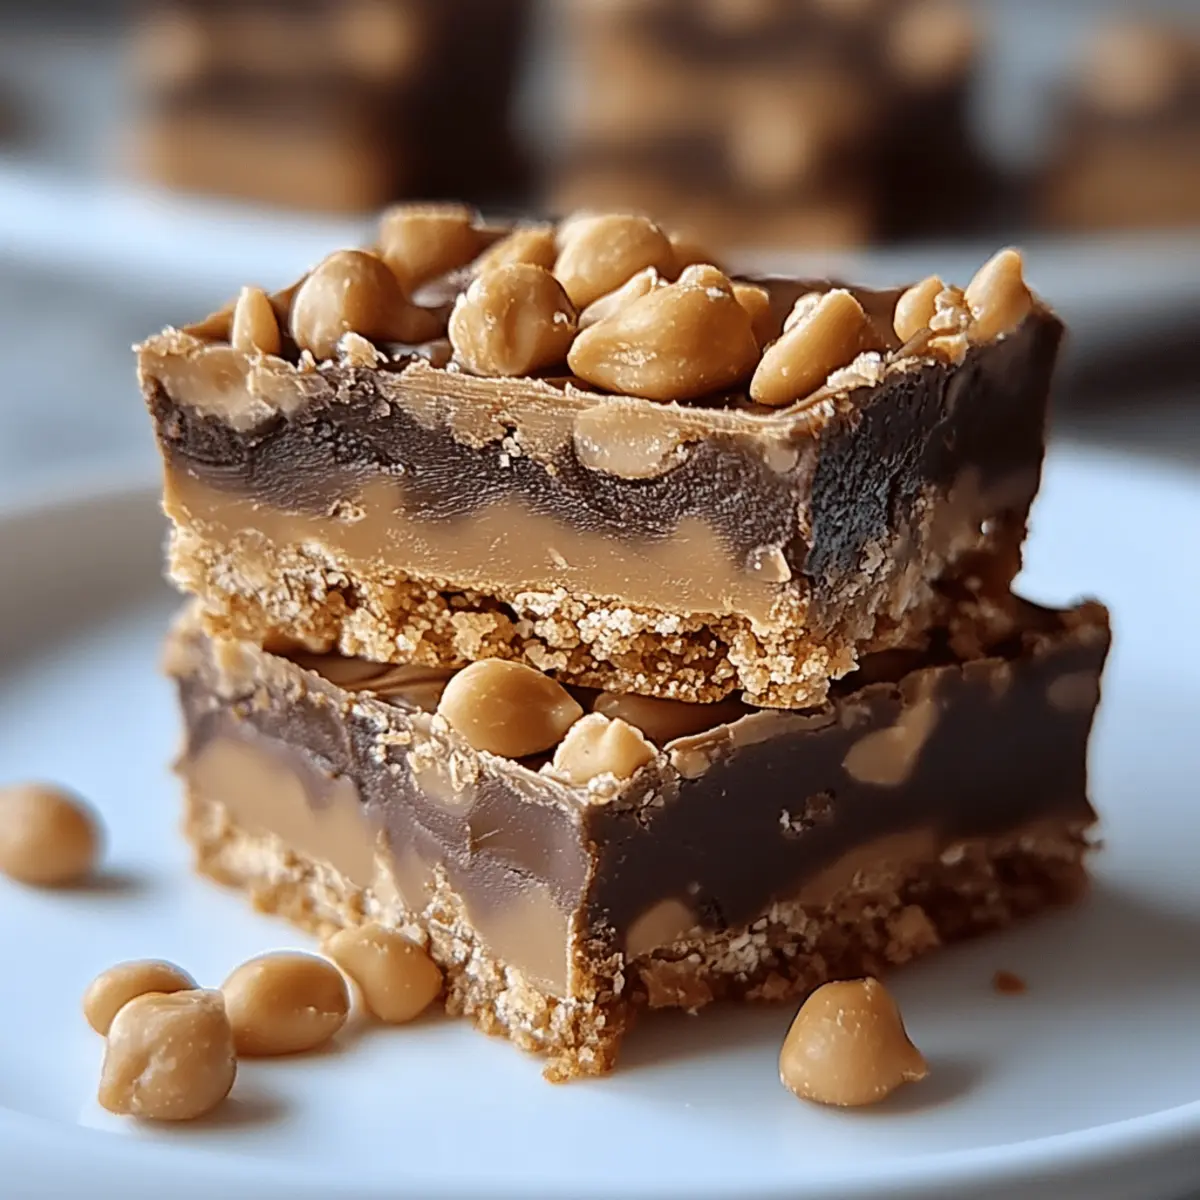
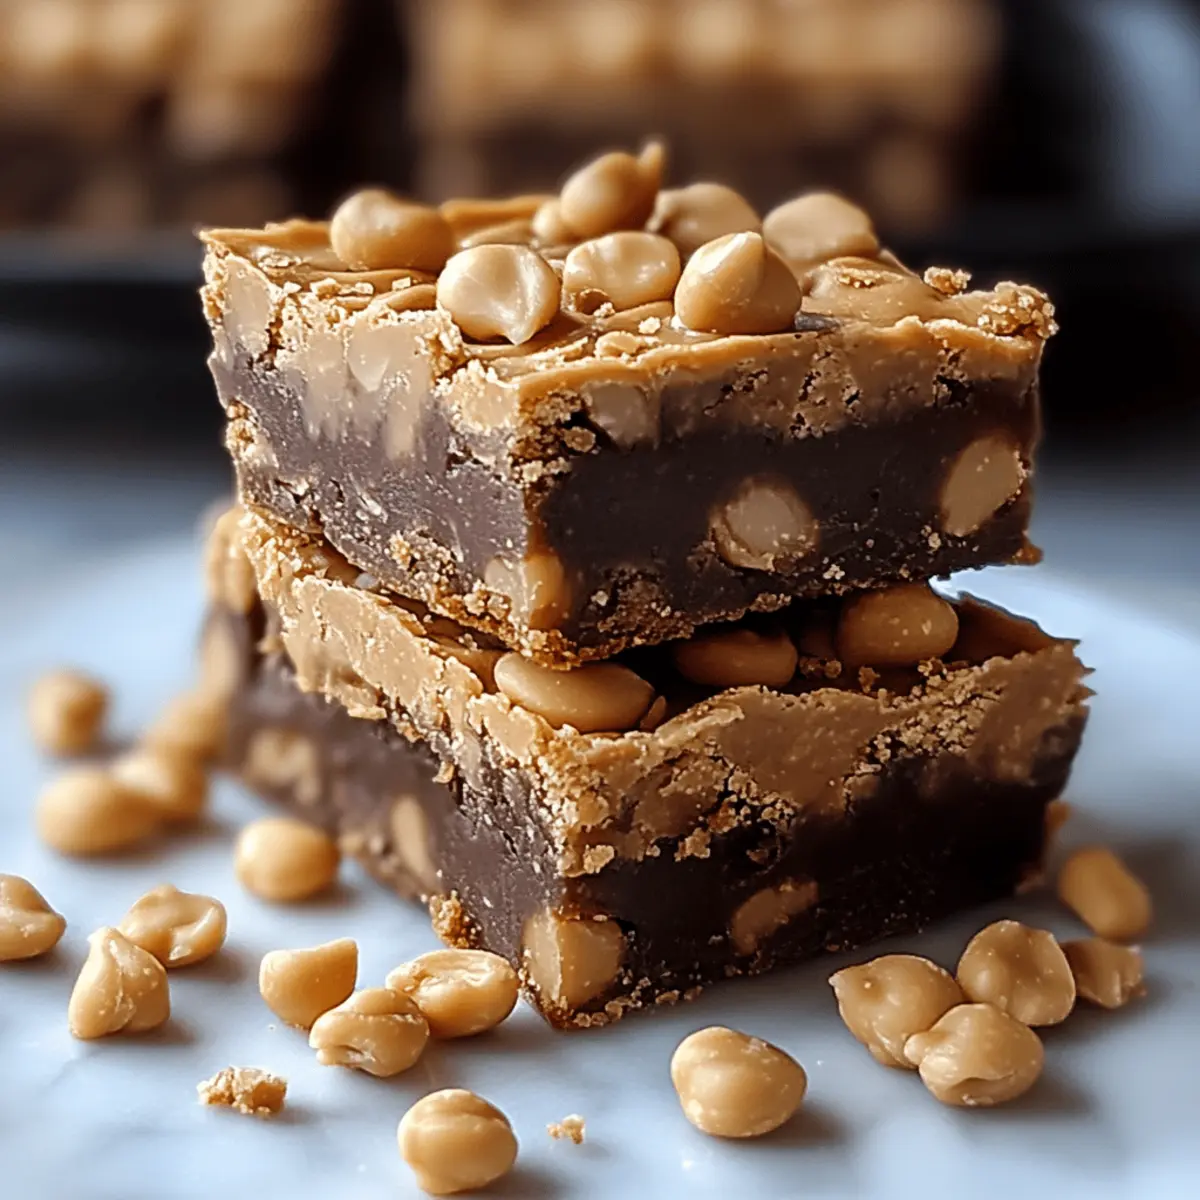
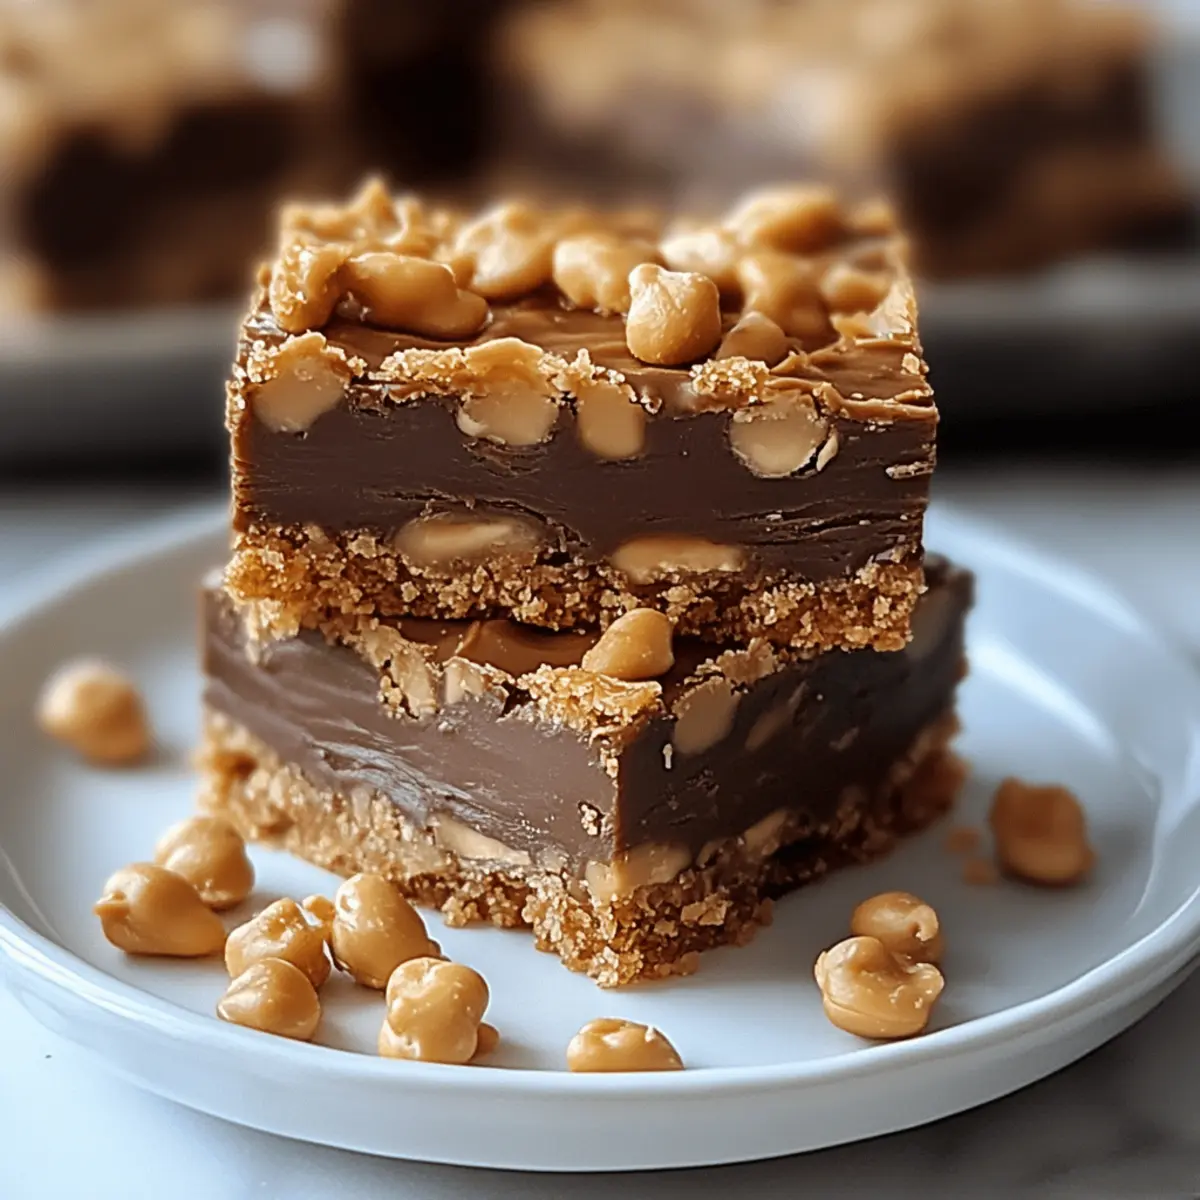
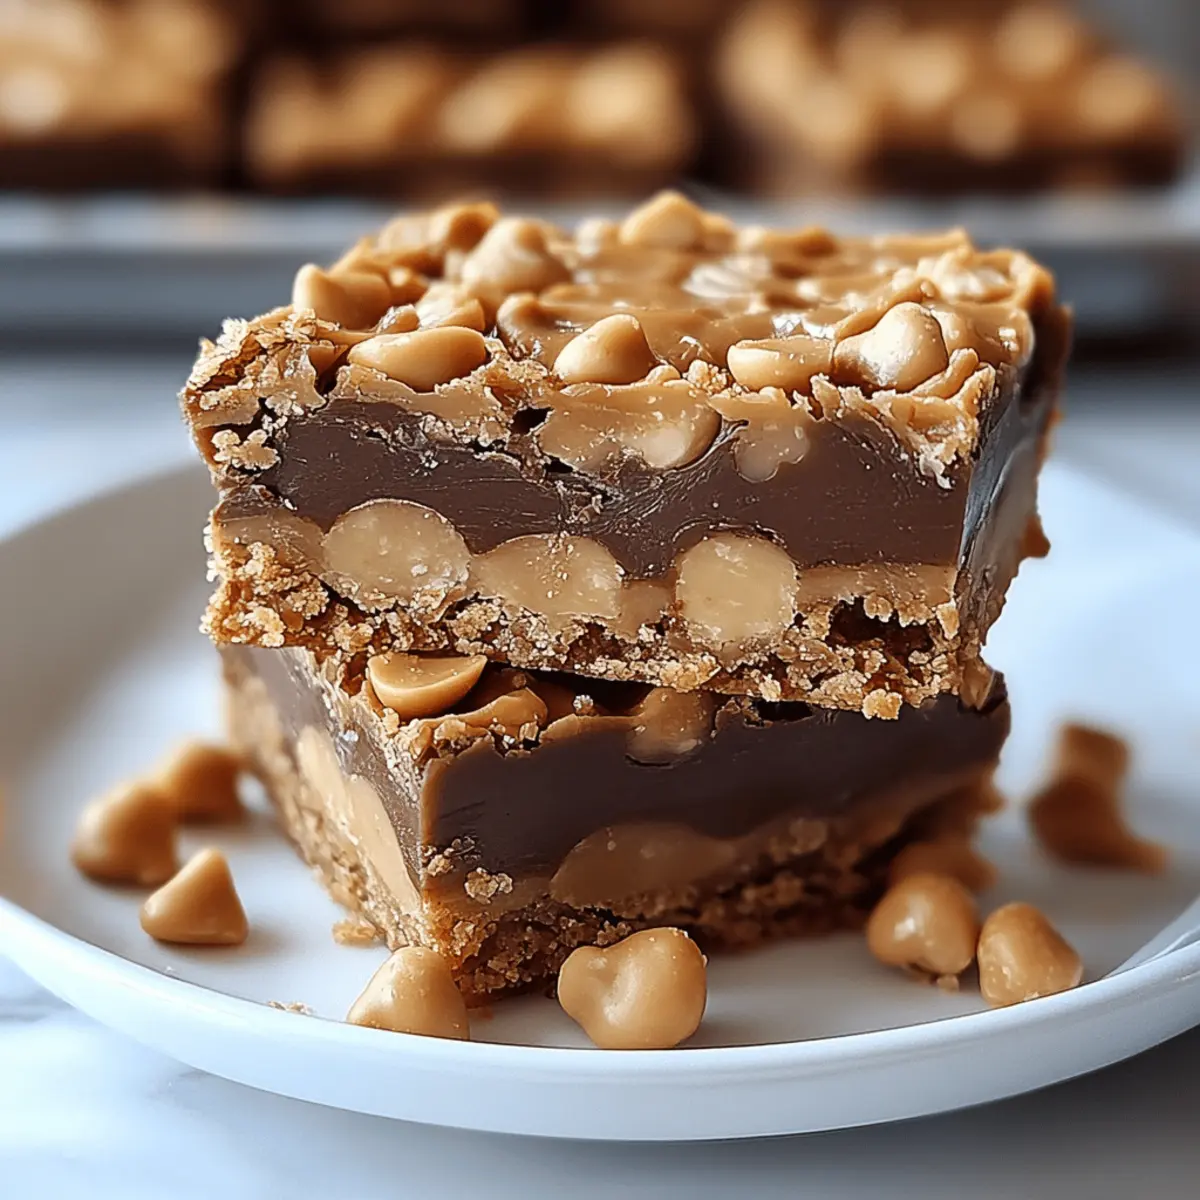
As I sat on a sun-drenched porch, memories of school lunches flooded back—especially those delightful days when peanut butter and chocolate made their way into my lunchbox. These School Lunch Peanut Butter Bars capture that nostalgic sweetness, blending chewy oats with a luscious chocolate topping that’s sure to win hearts. Made with minimal ingredients, this straightforward recipe is a time-saver, perfect for busy weekdays, and can even be tailored to suit dietary preferences, including gluten-free options. Each batch yields 16 delectable bars, making them an ideal choice for lunchboxes or as an after-school treat. Are you ready to bring back those beloved flavors and create something your family will crave? Let’s dive in!
Why Are These Peanut Butter Bars Irresistible?
Quick and Easy: This recipe requires just a handful of ingredients, making it a breeze to whip up on busy days.
Nostalgic Delight: The combination of peanut butter and chocolate transports you back to carefree school days, satisfying your sweet tooth with comforting flavors.
Customizable Options: With suggestions for flour alternatives and nut additions, you can easily adapt the recipe to fit your dietary needs or cravings.
Perfect for Sharing: Yielding 16 generous bars, it's a crowd-pleaser ideal for lunchboxes, playdates, or dessert parties.
Balanced Snack: Packed with protein from peanut butter and fiber from oats, they make for a filling treat that keeps everyone energized.
Set it and Forget it: Bake a batch, let them cool, and you've got snacks ready for the week—no fuss involved!
School Lunch Peanut Butter Bars Ingredients
Prepare to create your own nostalgic treats with these delicious School Lunch Peanut Butter Bars!
For the Base
- Unsalted Butter – Adds richness and moisture to the bars; substitute with coconut oil for a dairy-free option.
- Creamy Peanut Butter – Offers that essential peanut flavor; feel free to use chunky peanut butter for added texture.
- Granulated Sugar – Sweetens the bars; coconut sugar is a lower-glycemic alternative if desired.
- Light Brown Sugar – Enhances moisture with a hint of caramel flavor; swapping for dark brown sugar will deepen the taste.
- Large Eggs – Provides necessary structure and moisture; try flax eggs for a vegan version.
- Vanilla Extract – Boosts flavor depth; opt for pure vanilla extract for the best results.
For the Dry Mixture
- All-Purpose Flour – Gives the bars their shape; use a certified gluten-free flour blend if necessary.
- Baking Soda – Essential for leavening; no direct substitutes here.
- Salt – Enhances overall flavor; be sure to include this for balance.
- Quick-Cooking Oats – Delivers that chewy texture; do not substitute with old-fashioned oats for the same chewiness.
For the Topping
- Semisweet Chocolate Chips – The main component of the decadent topping; dark chocolate chips can be used for a more intense flavor.
- Creamy Peanut Butter (for topping) – Blends beautifully when melted with chocolate; consider almond butter for a different twist.
With these ingredients in hand, you're just steps away from creating School Lunch Peanut Butter Bars that will delight everyone!
Step‑by‑Step Instructions for School Lunch Peanut Butter Bars
Step 1: Preheat the Oven
Start by preheating your oven to 350°F (175°C). While the oven warms up, prepare a 13×9-inch baking pan by greasing it with cooking spray or lining it with parchment paper. This step will ensure your School Lunch Peanut Butter Bars release easily once baked, making for a smooth cooling process afterward.
Step 2: Cream the Ingredients
In a large mixing bowl, combine softened unsalted butter, 1 cup of creamy peanut butter, granulated sugar, and light brown sugar. Using an electric mixer, beat them together on medium speed for about 3 minutes until the mixture is light and fluffy. This creates a rich base for your bars that’s full of flavor.
Step 3: Incorporate the Eggs and Vanilla
Add the large eggs one at a time, ensuring you beat well after each addition. Once all eggs are incorporated, mix in 1 teaspoon of vanilla extract. This step adds warmth and depth to your School Lunch Peanut Butter Bars, making them irresistibly tasty.
Step 4: Whisk the Dry Ingredients
In a separate bowl, whisk together the all-purpose flour, baking soda, and salt. This helps to evenly distribute the leavening agents and salt throughout the mixture. Gradually add this dry mixture to the wet ingredients while mixing on low speed, ensuring everything is combined without overmixing.
Step 5: Fold in the Oats
Gently fold in 2 cups of quick-cooking oats into the batter until they are evenly mixed. This will introduce a chewy texture to your bars, making each bite satisfying. Take care not to overwork the mixture; you want the oats to be just incorporated for the best result.
Step 6: Spread the Batter
Pour the peanut butter oat mixture into the prepared 13×9-inch baking pan. Using a spatula, spread it evenly and smooth the top to ensure a consistent bake. This is a critical step, as an even layer will help your School Lunch Peanut Butter Bars bake uniformly.
Step 7: Bake the Bars
Place the pan in the preheated oven and bake for 20–25 minutes. The edges should turn golden brown and a toothpick inserted into the center should come out clean. Keep an eye on them during the last few minutes to prevent overbaking, as this can affect the texture.
Step 8: Prepare the Topping
While the bars are baking, melt 1 cup of semisweet chocolate chips with the remaining ½ cup of creamy peanut butter in a microwave-safe bowl. Heat in the microwave in 30-second intervals, stirring in between until smooth and fully combined. This luscious topping will enhance the flavor of your School Lunch Peanut Butter Bars.
Step 9: Spread the Topping
Once the bars are finished and slightly cooled, pour the melted chocolate-peanut butter mixture over the top. Use a spatula to spread it evenly across the bars, ensuring every bite is rich and decadent. This step is what will make your bars truly special, adding that delightful chocolate layer.
Step 10: Cool and Cut
Allow the bars to cool completely on a wire rack. This cooling period is essential for the topping to set firmly. Once they are cool, cut the bars into 16 squares using a sharp knife, wiping the blade between cuts for clean edges. Your School Lunch Peanut Butter Bars are now ready to be enjoyed!
School Lunch Peanut Butter Bars Variations
Now that you’ve mastered the basics, let’s explore some delightful ways to customize these bars to your heart’s content!
- Dairy-Free: Substitute unsalted butter with coconut oil for a rich, creamy texture while keeping it dairy-free and delightful.
- Gluten-Free: Swap all-purpose flour with a certified gluten-free flour blend to enjoy these bars without worry.
- Nuts Galore: Add chopped walnuts, pecans, or almonds to the base for a delightful crunch that complements the creamy peanut butter.
- Fruity Twist: Stir in some dried cranberries or chopped dates into the mixture before baking for a naturally sweet addition.
- Extra Chocolate: For chocolate lovers, mix in extra chocolate chunks or chips to the batter, ensuring every bite is a chocolatey delight.
- Salted Caramel: Drizzle a homemade or store-bought caramel sauce on top of the chocolate-peanut butter layer for a sweet and savory twist that’s irresistible.
- Spicy Kick: Add a pinch of cayenne pepper or chili powder to the dry ingredients to give your bars a surprising, warming kick that balances sweetness.
- Nut Butter Swap: Experiment by swapping creamy peanut butter for almond or cashew butter to give your bars a new flavor profile that is equally delicious.
Feel free to embrace your creativity! Each variation allows you to craft School Lunch Peanut Butter Bars tailored to your family's taste preferences, ensuring that every batch is a cherished reminder of those sweet childhood lunches.
What to Serve with School Lunch Peanut Butter Bars
Elevate your snack time or dessert experience with delightful accompaniments that enhance those nostalgic flavors.
-
Cold Milk: A classic pairing, this creamy beverage is perfect for washing down the sweetness, bringing out the rich peanut butter notes.
-
Vanilla Ice Cream: Adding a scoop of creamy vanilla ice cream creates a delightful contrast of temperatures and textures, making every bite a treat.
-
Fresh Fruit Salad: A refreshing balance of sweetness and acidity from assorted fruits complements the richness of the bars, enhancing your overall flavor experience.
-
Chocolate Drizzle: Drizzling a bit of melted chocolate on top adds sophistication, making it not just a snack but a dessert to impress.
-
Peanut Butter Dip: Pair with a smooth peanut butter yogurt dip, ideal for those who want to enhance the peanut butter flavor even more.
-
Hot Chocolate: For a cozy pairing, serve these bars alongside a warm mug of hot chocolate, bringing warmth and nostalgia together in one delicious moment.
Each of these combinations will create a memorable treat that captures the joy of childhood snacking!
Storage Tips for School Lunch Peanut Butter Bars
Room Temperature: Store the bars in an airtight container at room temperature for up to 5 days. This keeps them fresh and chewy for snacking anytime!
Fridge: For longer shelf life, refrigerate the bars, where they can last for up to 10 days, preserving their rich flavors and textures.
Freezer: Freeze the School Lunch Peanut Butter Bars in a freezer-friendly container for up to 3 months. Thaw overnight in the fridge before enjoying.
Reheating: If you prefer warm bars, gently reheat in the microwave for a few seconds. This helps to revitalize the chocolate topping's creaminess!
Expert Tips for Perfect Peanut Butter Bars
-
Cool Completely: Ensure your School Lunch Peanut Butter Bars cool fully so the chocolate topping sets properly, preventing a gooey mess.
-
Use a Sharp Knife: Cut the bars with a sharp knife for clean edges. Wipe the knife between cuts to maintain neatness and presentation.
-
Check for Doneness: Use a toothpick to check if the bars are done; it should come out clean from the center. Avoid overbaking to maintain chewiness.
-
Store Wisely: Keep bars in an airtight container at room temperature for up to 5 days. For longer freshness, refrigerate them and enjoy later!
-
Experiment with Ingredients: Feel free to swap in different nut butters for variety or add mix-ins like nuts and dried fruit for extra flavor and texture.
Make Ahead Options
These School Lunch Peanut Butter Bars are perfect for meal prep enthusiasts! You can prepare the base of the bars up to 24 hours in advance by mixing all the ingredients and storing the batter in the refrigerator. When you’re ready to bake, simply follow the usual steps and pour the batter into the pan. Additionally, feel free to make the chocolate-peanut butter topping ahead of time and refrigerate it until you're ready to spread it over the cooled bars. For optimal freshness, store the finished bars in an airtight container at room temperature for up to 5 days or refrigerate them for an extended shelf life. This way, you'll have a delicious snack ready to enjoy at a moment's notice, just as satisfying as when fresh!
School Lunch Peanut Butter Bars Recipe FAQs
What type of peanut butter is best for these bars?
Creamy peanut butter is ideal for a smooth texture, but if you enjoy a little crunch, feel free to swap it for chunky peanut butter. Both options provide the delightful peanut flavor we all cherish!
How should I store the bars to keep them fresh?
Store the School Lunch Peanut Butter Bars in an airtight container at room temperature for up to 5 days to maintain their chewy goodness. If you want them to last longer, refrigerate them for up to 10 days. Just remember to bring them back to room temperature for that perfect bite!
Can I freeze these peanut butter bars?
Absolutely! You can freeze the School Lunch Peanut Butter Bars in a freezer-friendly container for up to 3 months. To thaw, simply leave them in the fridge overnight before enjoying. This way, you’ll have tasty snacks on hand when the cravings strike!
What should I do if my bars are too dry?
If you find that your bars are a bit dry, it may be due to overbaking or using too much flour. Always keep an eye on the baking time—20-25 minutes is sufficient. If you want to add moisture, consider drizzling a bit of honey or extra peanut butter over the top before serving!
Are there any allergy considerations with this recipe?
Yes! This recipe includes peanuts, eggs, and gluten (unless you use a gluten-free flour). If preparing for someone with allergies, be sure to choose allergy-friendly substitutes—like flax eggs for an egg-free version or certified gluten-free flour to accommodate gluten sensitivities.
Can I add other ingredients to personalize my bars?
The more the merrier! Feel free to get creative by adding in chopped nuts, dried fruits, or even a sprinkle of sea salt on top. These additions not only enhance flavor but also provide various textures that elevate the overall experience of your School Lunch Peanut Butter Bars.
Delicious School Lunch Peanut Butter Bars Everyone Will Love
Ingredients
Equipment
Method
- Preheat your oven to 350°F (175°C) and prepare a 13×9-inch baking pan by greasing it or lining it with parchment paper.
- In a large mixing bowl, cream together unsalted butter, 1 cup of creamy peanut butter, granulated sugar, and light brown sugar for about 3 minutes until fluffy.
- Add the eggs one at a time, beating well after each addition, then mix in 1 teaspoon of vanilla extract.
- Whisk together the all-purpose flour, baking soda, and salt in a separate bowl. Gradually add this to the wet ingredients while mixing on low speed.
- Fold in 2 cups of quick-cooking oats gently into the batter until evenly mixed.
- Pour the mixture into the prepared baking pan and smooth the top with a spatula.
- Bake in the preheated oven for 20–25 minutes until the edges are golden and a toothpick inserted comes out clean.
- Melt 1 cup of semisweet chocolate chips with the remaining ½ cup of creamy peanut butter in a microwave-safe bowl.
- Once the bars are baked and slightly cooled, pour the melted chocolate-peanut butter mixture over the top and spread evenly.
- Allow the bars to cool completely on a wire rack before cutting into 16 squares.


Leave a Reply