
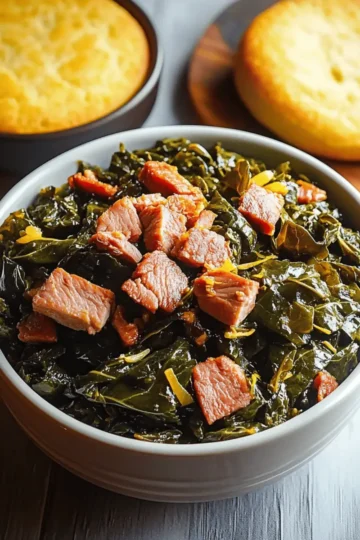
You know those days when you crave something cozy, but you want to skip the takeout? That’s where my cheesy Pierogi Casserole with Spinach and Smoked Sausage comes in—a comforting hug in a dish! This delightful layered bake combines tender potato pierogi with creamy cheese and smoky kielbasa, making it the perfect solution for busy weeknights or casual family dinners. Not only is it easy to prepare (hello, minimal effort!), but it's also incredibly customizable to suit your taste—swap in your favorite vegetables or choose a meatless option, and you’ve got yourself a crowd-pleaser that everyone will love. Ready to transform the way you enjoy comfort food? Let’s dive into this delicious recipe!

Why is Pierogi Casserole a Must-Try?
Comforting and cozy, this casserole is the ultimate homemade dish to satisfy those cravings!
Easy to customize: Feel free to swap vegetables or proteins to suit your preferences—vegetarian options are a breeze!
Time-saving: Perfect for busy weeknights, it comes together in under an hour, making weeknight dinners less stressful.
Crowd favorite: Whether you're entertaining guests or feeding a hungry family, its rich flavors are sure to impress.
Texture harmony: Each bite delivers a glorious mix of creamy cheese and tender pierogi, topped with a crispy, golden layer.
With just a few ingredients, you can create a delightful meal that'll have everyone asking for seconds!
Pierogi Casserole Ingredients
For the Casserole Layers
• Pierogi – Use high-quality frozen or homemade pierogi for the best texture and flavor.
• Cheddar Cheese Soup – This creamy base binds everything together; you can substitute it with cream of mushroom soup if preferred.
• Shredded Cheddar Cheese – Adds savory flavor and creates a deliciously crispy topping when baked.
• Farmer's Cheese – Provides creaminess; ricotta or cottage cheese can be used as a swap for a milder taste.
• Spinach – Freshness and color elevate the dish; remember to drain it well to avoid excess moisture.
• Smoked Kielbasa Sausage – Infuses the dish with savory, smoky goodness; can be swapped for bacon or a plant-based sausage for versatility.
• Onion (finely chopped) – Adds a lovely depth of flavor; lightly sautéing it can bring out its natural sweetness.
• Olive Oil – Essential for greasing the baking dish and preventing sticking; it helps with browning too.
• Kosher Salt – Enhances flavor; adjust according to your taste preference.
Optional Toppings
• Scallions – Fresh minced scallions make for a vibrant garnish right before serving.
Feel free to get creative with this Pierogi Casserole recipe!
Step‑by‑Step Instructions for Pierogi Casserole
Step 1: Preheat and Prepare
Begin by preheating your oven to 375°F (190°C). While that’s heating up, grab a 13 x 9-inch baking dish and lightly grease it with a drizzle of olive oil. This will ensure your cheesy Pierogi Casserole doesn’t stick while baking, allowing for easy serving later on.
Step 2: Arrange the Pierogi
Next, take about 12 pierogi and arrange them in a single layer at the bottom of your greased baking dish. Make sure they fit snugly together for a solid base. This layer will soak up the flavors from the ingredients above, providing a hearty foundation for your delicious casserole.
Step 3: Combine the Cheeses
In a mixing bowl, combine the cheddar cheese soup with three quarters of the shredded cheddar cheese. Stir until well mixed and creamy. Pour half of this gooey mixture over the arranged pierogi, ensuring even coverage. This will help bind everything together as it bakes.
Step 4: Layer the Fillings
Now, add half of the farmer’s cheese, followed by a layer of drained spinach, chopped onion, and diced smoked kielbasa. Lightly sprinkle with kosher salt to enhance the flavors. This colorful layer brings freshness and a savory kick, crucial for elevating your Pierogi Casserole to new heights.
Step 5: Repeat the Layers
It's time to repeat the layering! Place the remaining pierogi on top of the first layer, followed by the rest of the cheese soup mixture, remaining farmer’s cheese, spinach, onion, and kielbasa. This second set of layers locks in the rich and creamy goodness, ensuring every bite is satisfying.
Step 6: Final Topping
Sprinkle the remaining shredded cheddar cheese on top of the casserole for that irresistible cheesy crust. Drizzle a little olive oil over the top; this will help it become golden and crispy as it bakes. This step is key to achieving that perfect finishing touch on your Pierogi Casserole.
Step 7: Bake to Perfection
Slide your assembled casserole into the preheated oven and bake for 45 minutes. You’ll know it’s done when the cheese is bubbly and the edges are lightly golden. If you prefer an extra crispy top, switch to broil settings for the last 2–3 minutes of baking, watching closely to avoid burning.
Step 8: Garnish and Serve
Once baked, remove your Pierogi Casserole from the oven and let it cool for a few minutes. Before serving, garnish with freshly minced scallions for a pop of color and extra flavor. This final touch enhances the dish beautifully, making it ready to impress at your family dinner or cozy gathering.

What to Serve with Cheesy Pierogi Casserole with Spinach and Smoked Sausage
Create a balanced and memorable meal alongside this comforting dish that families will adore!
- Simple Green Salad: A light, refreshing mix of greens tossed with a zesty vinaigrette adds a crisp contrast to the rich casserole.
- Roasted Vegetables: Roasted Brussels sprouts or carrots offer a delightful crunch and caramelized sweetness that pairs perfectly with the savory dish.
- Garlic Breadsticks: Soft, buttery garlic breadsticks serve as a delightful dipper for any cheesy leftovers and enhance the cozy vibe of your meal.
- Apple Sauce: The sweet and tangy notes of homemade or store-bought apple sauce cut through the creamy layers, providing a refreshing burst of flavor.
- Cranberry Sauce: Perfect for an unexpected twist, this tart condiment livens up the plate, bringing a bright acidity to balance the hearty casserole.
- Chilled Chardonnay: A glass of chilled Chardonnay complements the creamy cheese with its fruity notes, making every bite more enjoyable.
- Decadent Brownies: For dessert, rich, fudgy brownies create a lovely ending to your meal, balancing the savory flavors with a sweet treat.
Elevate your dining experience by serving these delightful sides with your cheesy Pierogi Casserole!
How to Store and Freeze Pierogi Casserole
Fridge: Leftovers can be stored in an airtight container in the refrigerator for up to 3 days. Reheat in the microwave or oven until warmed through.
Freezer: For longer storage, assemble the casserole but do not bake it. Cover tightly with plastic wrap or foil and freeze for up to 3 months; bake from frozen.
Reheating: When reheating, cover loosely with foil to maintain moisture. Bake at 350°F (175°C) for about 30 minutes or until heated through.
Portioning: Consider portioning out servings before freezing; this way, you can easily grab and heat one or two pieces at a time when cravings for that comforting Pierogi Casserole arise!
Pierogi Casserole Variations & Substitutions
Let your creativity shine by tweaking this recipe to best suit your tastes and preferences!
-
Vegetarian: Omit the kielbasa and add extra veggies like zucchini or bell peppers for a tasty plant-based option.
. You can pack in the flavor with spices and herbs to keep the dish exciting without meat. -
Dairy-Free: Replace the cheese soup and farmer's cheese with a coconut milk-based version and nutritional yeast for a cheese-like flavor.
. This is a wonderful way to maintain creaminess while accommodating dietary restrictions! -
Gluten-Free: Use gluten-free pierogi and ensure other ingredients such as soy sauce or broth are also gluten-free.
. This twist allows those with gluten sensitivities to indulge in this hearty casserole blissfully. -
Spicy Kick: Introduce some heat by adding diced jalapeños or a drizzle of hot sauce into the layers.
. If you like it hot, this will transform your dish into a fiery delight, perfect for spice lovers. -
Flavor Boost: Enhance the flavors by incorporating garlic powder or fresh herbs like basil or thyme into the cheese mixture.
. The aroma from fresh herbs can elevate the entire eating experience, making each bite a burst of flavor! -
Texture Twist: Consider adding crunchy toppings like breadcrumbs or crushed tortilla chips before baking for extra texture.
. This adds a delightful contrast to the creamy interior, making every spoonful an adventure! -
Different Cheeses: Experiment with cheeses beyond cheddar—try gouda, mozzarella, or even a bit of blue cheese for a bold finish.
. Each cheese brings its unique flavor profile, creating distinct varieties of this classic dish. -
Add Protein: Swap kielbasa for seasoned ground beef, turkey, or plant-based ground meat for a hearty variation.
. Incorporating different proteins can reshape this casserole while keeping it satisfying and fulfilling.
Feel free to mix and match these ideas to make this Pierogi Casserole your own, creating warm, comforting meals that cater to everyone's tastes! Don't forget to check out some of my favorite vegetarian recipes for more inspiration!
Make Ahead Options
This Cheesy Pierogi Casserole is perfect for meal prep enthusiasts! You can assemble the entire casserole up to 24 hours in advance, making weeknight dinners a breeze. Simply layer the pierogi, cheese, spinach, and kielbasa as directed, and cover it tightly with plastic wrap before refrigerating. To maintain quality, make sure the spinach is well drained to prevent excess moisture. When you’re ready to enjoy, remove the casserole from the fridge and bake it straight from cold, adding an extra 5-10 minutes to the baking time if needed. This way, you’ll have a comforting, hearty meal ready to serve with minimal effort!
Expert Tips for Pierogi Casserole
-
Drain Spinach Well: Thoroughly squeeze out excess moisture from the spinach to avoid sogginess in your casserole.
-
Pre-Cook Fresh Pierogi: If using fresh pierogi, pre-cook them for better tenderness in the final bake to ensure a delightful texture.
-
Make Ahead: Assemble the casserole up to a day in advance, cover tightly, and refrigerate. Bake it fresh on a busy weeknight for convenience.
-
Foil for Reheating: When reheating leftovers, cover loosely with foil to maintain moisture and prevent drying out.
-
Swap with Confidence: Don’t hesitate to swap ingredients! This Pierogi Casserole welcomes your favorite vegetables or proteins for a personalized touch.

Pierogi Casserole Recipe FAQs
What kind of pierogi should I use?
I recommend using high-quality frozen pierogi for convenience, but homemade versions definitely give a heartwarming touch. Look for pierogi with a good balance of filling and pasta. If you're feeling adventurous, try to experiment with different fillings like cheese, potato, or even sauerkraut!
How can I store leftovers of the Pierogi Casserole?
Leftovers can be stored in an airtight container in the refrigerator for up to 3 days. Just make sure to let it cool before sealing it up. When you're ready, reheat in the microwave or oven until warmed through, but don’t forget to cover it to keep that moisture in!
Can I freeze the Pierogi Casserole?
Absolutely! For freezing, assemble the casserole but do not bake it. Cover it tightly with plastic wrap or foil and freeze for up to 3 months. When you’re ready to enjoy it, bake it directly from frozen at 375°F (190°C) for about an hour, or until bubbling and heated through. Just keep an eye on the top to prevent over-browning!
What should I do if the casserole seems too dry after baking?
If your casserole turns out on the dry side, give it a good drizzle of melted butter or a splash of cream before serving, which will help enhance the richness. Next time, ensure that your spinach is well-drained but not completely dry, and consider adding a touch more cheese or soup mixture for moisture!
Is this Pierogi Casserole suitable for vegetarians?
Yes! You can easily make it vegetarian by omitting the smoked kielbasa and replacing it with your favorite plant-based sausage or just adding more vegetables like mushrooms, peppers, or zucchini. Just keep in mind to verify all the ingredients, like the cheese, to confirm they are vegetarian-friendly.
How long can I prepare the Pierogi Casserole in advance?
You can assemble this casserole up to a day in advance! Just cover it tightly and refrigerate; this is a big time-saver for busy weeknights! You'll still bake it fresh the next day, ensuring that delightful, comforting warmth is ready for your meal.

Indulgent Pierogi Casserole for Cozy Weeknight Dinners
Ingredients
Equipment
Method
- Preheat your oven to 375°F (190°C) and grease a 13 x 9-inch baking dish with olive oil.
- Arrange 12 pierogi in a single layer at the bottom of the greased baking dish.
- In a mixing bowl, combine the cheddar cheese soup with three quarters of the shredded cheddar cheese and pour half over the arranged pierogi.
- Add half of the farmer’s cheese, drained spinach, chopped onion, and diced smoked kielbasa, sprinkling with kosher salt.
- Repeat the layering with remaining pierogi, cheese soup mixture, farmer’s cheese, spinach, onion, and kielbasa.
- Sprinkle remaining shredded cheddar cheese on top and drizzle a little olive oil over it.
- Bake in the preheated oven for 45 minutes or until cheese is bubbly and edges are lightly golden.
- Remove from the oven, let cool for a few minutes, and garnish with minced scallions before serving.


Leave a Reply