
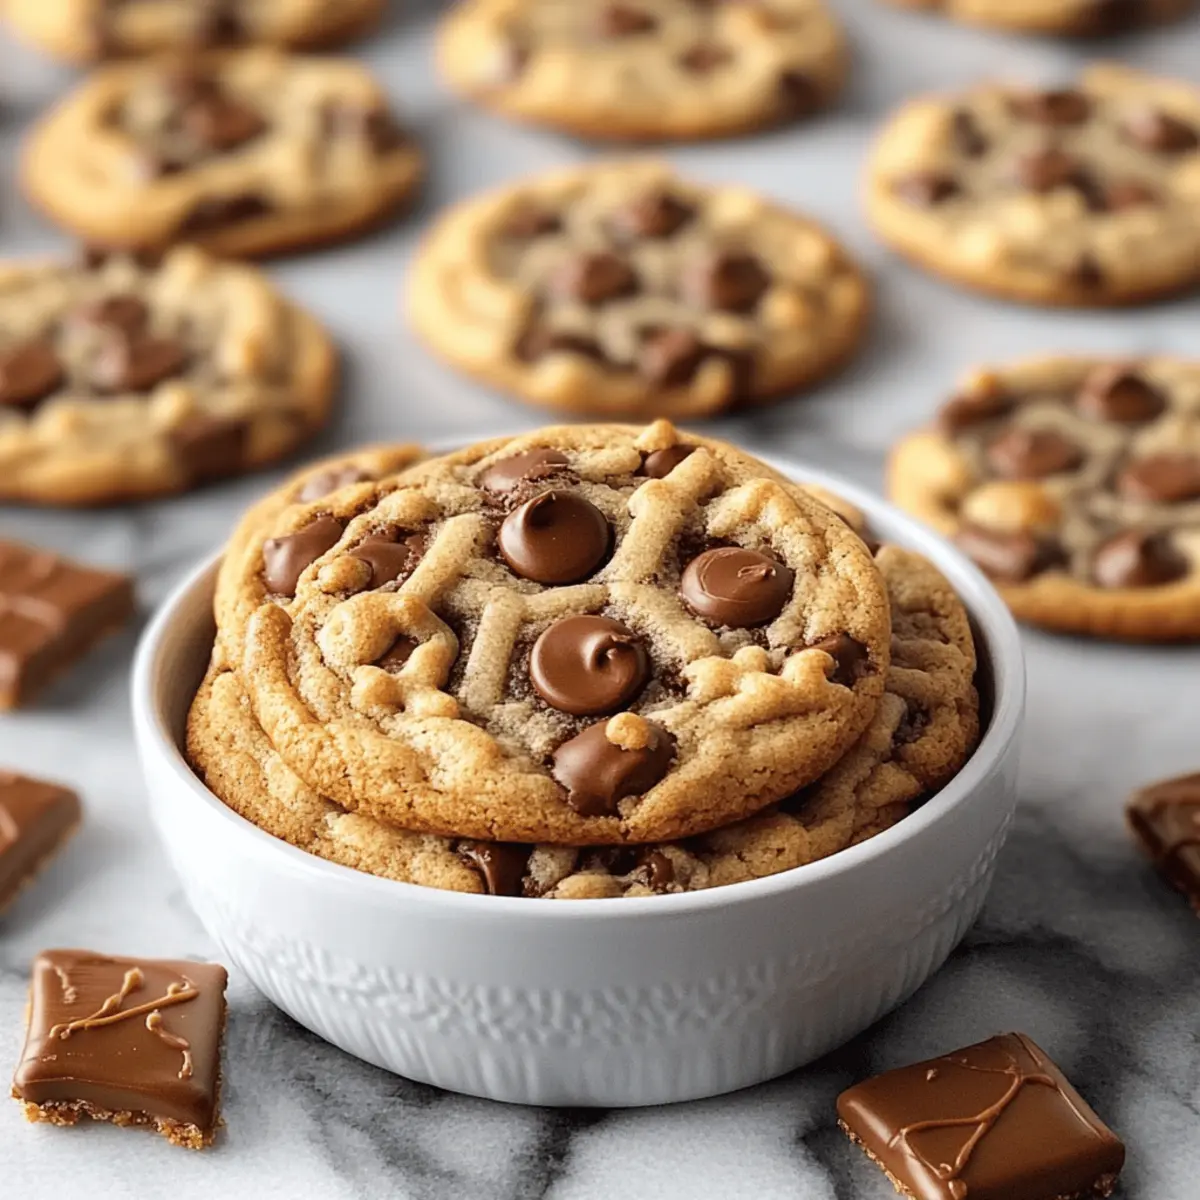
As the aroma of melting chocolate and caramel fills the kitchen, I can’t help but smile at the prospect of these Kitchen Sink Cookies. Each batch is a delightful adventure, brimming with sweet chocolate chunks, salty pretzel bites, and gooey caramel bits that tantalize the senses. What I love most about this flexible recipe is how easily you can tailor it to your tastes, making it a perfect baking project for both seasoned chefs and curious novices alike. Plus, these cookies are a fantastic make-ahead treat, ensuring that you always have a scrumptious dessert on hand for any occasion. Curious about how this delightful medley comes together? Let’s dive into the cookie magic!

Why Are Kitchen Sink Cookies So Irresistible?
Versatility reigns supreme in this recipe, allowing you to mix and match your favorite add-ins—from chocolate chips to pretzels—making each batch uniquely yours. Mouthwatering flavors explode with every bite, blending sweet and salty in perfect harmony. Quick and easy, they come together in less than 30 minutes—ideal for that sudden cookie craving! Perfect for sharing, these cookies impress friends and family alike, earning you rave reviews. Plus, you can enjoy them warm from the oven or store them for later, effortlessly satisfying your sweet tooth anytime!
Kitchen Sink Cookies Ingredients
Get ready to whip up a batch of these irresistible Kitchen Sink Cookies!
For the Dough
- Butter – Adds rich moisture; make sure it's slightly cooled before mixing with sugar to avoid cooking the eggs.
- Brown Sugar – Provides moisture and chewiness; you can use white sugar if you prefer a lighter cookie.
- Granulated Sugar – Increases sweetness and promotes browning; for a denser texture, use all brown sugar.
- Egg – Binds ingredients together for a chewy texture; beat until smooth for the best results.
- Vanilla Extract – Enhances flavor depth; almond extract can be a delightful alternative.
- Baking Soda – Helps the cookies rise; ensure it’s evenly mixed for a consistent texture.
- Salt – Balances the sweetness; consider using sea salt for an extra touch of flavor.
- All-Purpose Flour – Forms the cookie’s structure; be careful not to overmix, stopping as soon as the flour is incorporated.
For the Mix-Ins
- Semi-Sweet & Milk Chocolate Chips – Adds sweetness and melty chocolate flavor; feel free to swap for dark chocolate for a more intense taste.
- Pretzels – Brings a delightful crunch and salty bite; choose mini or regular pretzels as per your liking.
- Caramel Bits – Infuses gooey sweetness; use chopped caramel squares if bits aren’t available, ensuring they melt evenly.
These ingredients are sure to create the ultimate Kitchen Sink Cookies that everyone will adore!
Step‑by‑Step Instructions for Kitchen Sink Cookies
Step 1: Prep Ingredients
Start by roughly chopping your semi-sweet and milk chocolate chips, as well as the caramel bits. Break the pretzels into smaller pieces—keeping some larger for topping—as this will enhance the texture of your Kitchen Sink Cookies. Gather your ingredients and cooking tools, including a mixing bowl, spatula, and baking sheet, to streamline the process.
Step 2: Melt Butter
In a microwave-safe bowl, melt 1 cup of butter until fully liquid but not bubbling. Allow it to cool for about 5-10 minutes before using, as this is crucial to prevent scrambling the egg later. You want it to be warm but not hot to the touch when mixing with the sugars for your Kitchen Sink Cookies.
Step 3: Mix Sugars
In a large mixing bowl, combine the cooled melted butter with ¾ cup of brown sugar and ¾ cup of granulated sugar. Using a spatula, mix these together vigorously until the sugar is well incorporated and the mixture appears smooth and slightly glossy, which should take about 1-2 minutes.
Step 4: Combine Wet Ingredients
Next, add in 1 large egg and 2 teaspoons of vanilla extract to your sugar mixture. Stir until everything is combined and the wet ingredients take on a creamy texture, which should look uniform and inviting. This step is essential for binding and flavoring your Kitchen Sink Cookies.
Step 5: Combine Dry Ingredients
Sprinkle 1 teaspoon of baking soda and ½ teaspoon of salt over the wet mixture, ensuring you distribute them evenly. By folding these dry ingredients into your mixture using a spatula, you prepare your Kitchen Sink Cookies for the next step; mix until you can no longer see the dry ingredients.
Step 6: Incorporate Flour
Gently fold in 2 cups of all-purpose flour, allowing the dough to come together. Avoid overmixing; the goal is to stop as soon as the flour is just incorporated for optimal texture. You'll notice the dough will be slightly sticky and should hold together nicely.
Step 7: Add Mix-ins
Now it's time to deliciously stir in your chopped chocolate chips, pretzel bits, and caramel pieces. The goal is to ensure an even distribution of these mix-ins throughout your dough while maintaining its integrity. Once combined, let the dough rest for about 10 minutes, allowing the flavors to meld beautifully.
Step 8: Shape Cookies
Preheat your oven to 350°F. Scoop out portions of dough using a ¼ cup measuring cup, shaping them into balls. Slightly flatten each ball and press extra pretzel pieces on top to enhance the visual appeal. Arrange them on a baking sheet lined with parchment paper, ensuring enough space for spreading.
Step 9: Bake
Place the baking sheet in your preheated oven and bake for 12-14 minutes. Watch for the edges to turn golden brown while the center remains slightly underbaked. This contrast creates that perfect chewy texture for your Kitchen Sink Cookies, so don’t overbake!
Step 10: Cooling
Once baked, remove the baking sheet from the oven and let the cookies cool for 10-15 minutes. They will continue to firm up as they cool, so resist the urge to move them too soon. After cooling, transfer the cookies to a wire rack to cool completely and ensure a delightful chewy texture.
Expert Tips for Kitchen Sink Cookies
- Quality Counts: Use high-quality chocolate and fresh pretzels for the most flavorful Kitchen Sink Cookies. Cheap ingredients can compromise the taste.
- Butter Temperature: Make sure your melted butter is just slightly cooled. If it's too hot, it can cook the eggs, leading to unwanted texture issues.
- Consistent Size: Use a cookie scoop for uniform cookie sizes, ensuring even baking and an appealing look.
- Rest the Dough: Allow your cookie dough to rest for about 10 minutes before baking. This improves flavor and texture!
- Avoid Overmixing: Be careful not to overmix the flour when incorporating it; this keeps your Kitchen Sink Cookies tender and chewy.
- Experiment Freely: Don't hesitate to customize add-ins! Nuts, dried fruits, or different chocolate types can elevate your Kitchen Sink Cookies further.
How to Store and Freeze Kitchen Sink Cookies
Room Temperature: Store your cookies in an airtight container at room temperature for up to 3-4 days. This keeps them soft and delicious, perfect for snacking!
Fridge: If you prefer to keep them fresh longer, place the cookies in the fridge, where they can last up to a week. Just be sure to seal them tightly.
Freezer: Freeze your unbaked cookie dough balls in a single layer on a baking sheet, then transfer to an airtight container once firm. They can be stored for up to 3 months; bake directly from frozen, adding a couple of extra minutes to the baking time.
Reheating: To enjoy warm Kitchen Sink Cookies after storing, briefly reheat in the microwave for 10-15 seconds or pop them in a preheated oven at 350°F for 5 minutes. Enjoy that gooeyness all over again!
What to Serve with Kitchen Sink Cookies
Indulging in warm, gooey Kitchen Sink Cookies invites endless opportunities to create a delightful dessert experience.
- Cold Glass of Milk: A classic pairing that complements the sweet and salty flavors while balancing the cookie’s richness.
- Vanilla Ice Cream: Serve a scoop on the side to create a melt-in-your-mouth moment, as the ice cream contrasts the warm cookies beautifully.
- Coffee or Espresso: A strong brew enhances the sugary notes, providing a lovely backdrop for the cookie's diverse flavors.
- Chocolate Sauce Drizzle: Elevate each bite with a warm drizzle of chocolate sauce, adding more rich chocolatey goodness.
Imagine dipping your cookie into a creamy mug of milk or a hot cup of coffee—it's the perfect dessert moment!
- Caramel Dip: For caramel lovers, a sweet caramel dip amplifies the gooey explosions inside your cookies.
- Fresh Fruit Slices: Refresh your palate with vibrant fruit slices, introducing a bright contrast to the rich cookie flavor.
- Homemade Whipped Cream: Light and fluffy, whipped cream can soften each bite and lend an airy quality to your dessert experience.
- Chopped Nuts Topping: Sprinkling crunchy nuts over ice cream adds texture and complements the chewy cookie bites perfectly.
Make Ahead Options
These Kitchen Sink Cookies are perfect for meal prep enthusiasts looking to save time on busy days! You can prepare the cookie dough up to 24 hours in advance by mixing all your ingredients up to Step 7, then refrigerating the dough in an airtight container. This helps develop the flavors while also making it easier to scoop out cold, firm dough just before baking. Additionally, you can freeze shaped cookie dough balls for up to 3 months—simply place them on a baking sheet to freeze before transferring to a zip-top bag. When ready to bake, just add a couple of extra minutes to the baking time, and you'll have fresh, warm Kitchen Sink Cookies that are just as delicious as those baked immediately!
Kitchen Sink Cookies Variations
Feel free to explore and personalize your Kitchen Sink Cookies; the possibilities are as delightful as the cookies themselves!
-
Dairy-Free: Substitute butter with coconut oil and use dairy-free chocolate chips for a deliciously guilt-free treat.
-
Nutty Delight: Swap pretzels for your favorite nuts like pecans or walnuts to add a rich, nutty flavor and crunch.
-
Fruity Twist: Add ½ cup of dried cranberries or raisins to introduce a touch of sweetness that pairs beautifully with the chocolate.
-
Spicy Kick: For those who enjoy a bit of heat, incorporate a pinch of cayenne pepper or chili powder into the dough for a surprising flavor boost.
-
Different Chocolates: Experiment with white chocolate or dark chocolate chips for various rich flavors; each will bring a unique taste to your cookies.
-
Cookie Dough Bars: Turn the sweet dough into cookie bars by spreading it into a greased baking dish and adjusting baking time for a chewy texture throughout.
-
Vegan Option: Use a flax egg instead of a regular egg and make sure all your ingredients are plant-based to create delicious vegan Kitchen Sink Cookies.
-
Salted Caramel: Drizzle homemade or store-bought caramel sauce on top of the cookies before baking for an extra layer of decadent sweetness and flavor.
These variations let you make the recipe truly your own. Don’t forget to check out other fun ideas in our post on Cookie Dough Bars! You might also enjoy crafting delightful Peanut Butter Cookies for your next family gathering!

Kitchen Sink Cookies Recipe FAQs
What type of butter should I use for Kitchen Sink Cookies?
I recommend using unsalted butter for Kitchen Sink Cookies to control the saltiness of your recipe. Make sure it's melted and cooled slightly—this gives the cookies a rich flavor without overcooking the eggs when mixed.
How should I store my Kitchen Sink Cookies?
Keep your cookies in an airtight container at room temperature for about 3 to 4 days. If you'd like to keep them even fresher, refrigerate them where they’ll last up to a week—just remember to seal them tightly!
Can I freeze the dough for Kitchen Sink Cookies?
Absolutely! You can freeze the unbaked dough balls. Simply arrange them in a single layer on a baking sheet and freeze until solid, then transfer them to an airtight container. They can stay in the freezer for up to 3 months. When you're ready to bake, just pop them in the oven from frozen—add about 2-3 minutes to the baking time for perfectly baked cookies!
What if my dough is too sticky?
If you find your Kitchen Sink Cookies dough is too sticky, it's often due to the warmth of the melted butter. Chill the dough in the refrigerator for about 30 minutes to firm it up before shaping and baking. Also, ensure that you’re not overmixing—the dough should be slightly sticky, but manageable!
Can I substitute ingredients for dietary restrictions?
Certainly! You can substitute the all-purpose flour for a gluten-free blend or use coconut sugar instead of granulated sugar for a lower glycemic option. Just keep in mind that these changes may slightly alter the texture and flavor. And if anyone in the household has nut allergies, simply skip any nuts or use seeds like pumpkin or sunflower as a crunchy alternative!
What kind of mix-ins can I use in Kitchen Sink Cookies?
The beauty of Kitchen Sink Cookies lies in their flexibility! Feel free to swap out pretzels for your favorite nuts, or add dried fruits like cranberries or raisins for a sweetness punch. Different types of chocolate, such as dark or white chocolate, can also give your cookies a unique flavor twist!
These Kitchen Sink Cookies Recipe FAQs will surely help you along your baking journey!

Irresistible Kitchen Sink Cookies: Your New Favorite Treat
Ingredients
Equipment
Method
- Start by roughly chopping the semi-sweet and milk chocolate chips, as well as the caramel bits. Break the pretzels into smaller pieces—keeping some larger for topping.
- In a microwave-safe bowl, melt the butter until fully liquid but not bubbling. Allow it to cool for about 5-10 minutes.
- Combine the cooled melted butter with brown sugar and granulated sugar in a large mixing bowl. Mix until smooth and glossy.
- Add in the beaten egg and vanilla extract to the sugar mixture. Stir until ingredients are combined and creamy.
- Sprinkle the baking soda and salt over the wet mixture, mixing gently until no dry ingredients are visible.
- Fold in the all-purpose flour gently until just incorporated to avoid overmixing.
- Stir in the chocolate chips, pretzel bits, and caramel pieces evenly throughout the dough. Let the dough rest for about 10 minutes.
- Preheat your oven to 350°F. Scoop out portions of dough and flatten each ball slightly before placing on a baking sheet.
- Bake for 12-14 minutes until edges are golden brown but center remains slightly underbaked.
- Allow cookies to cool on the baking sheet for 10-15 minutes before transferring to a wire rack to cool completely.


Leave a Reply