
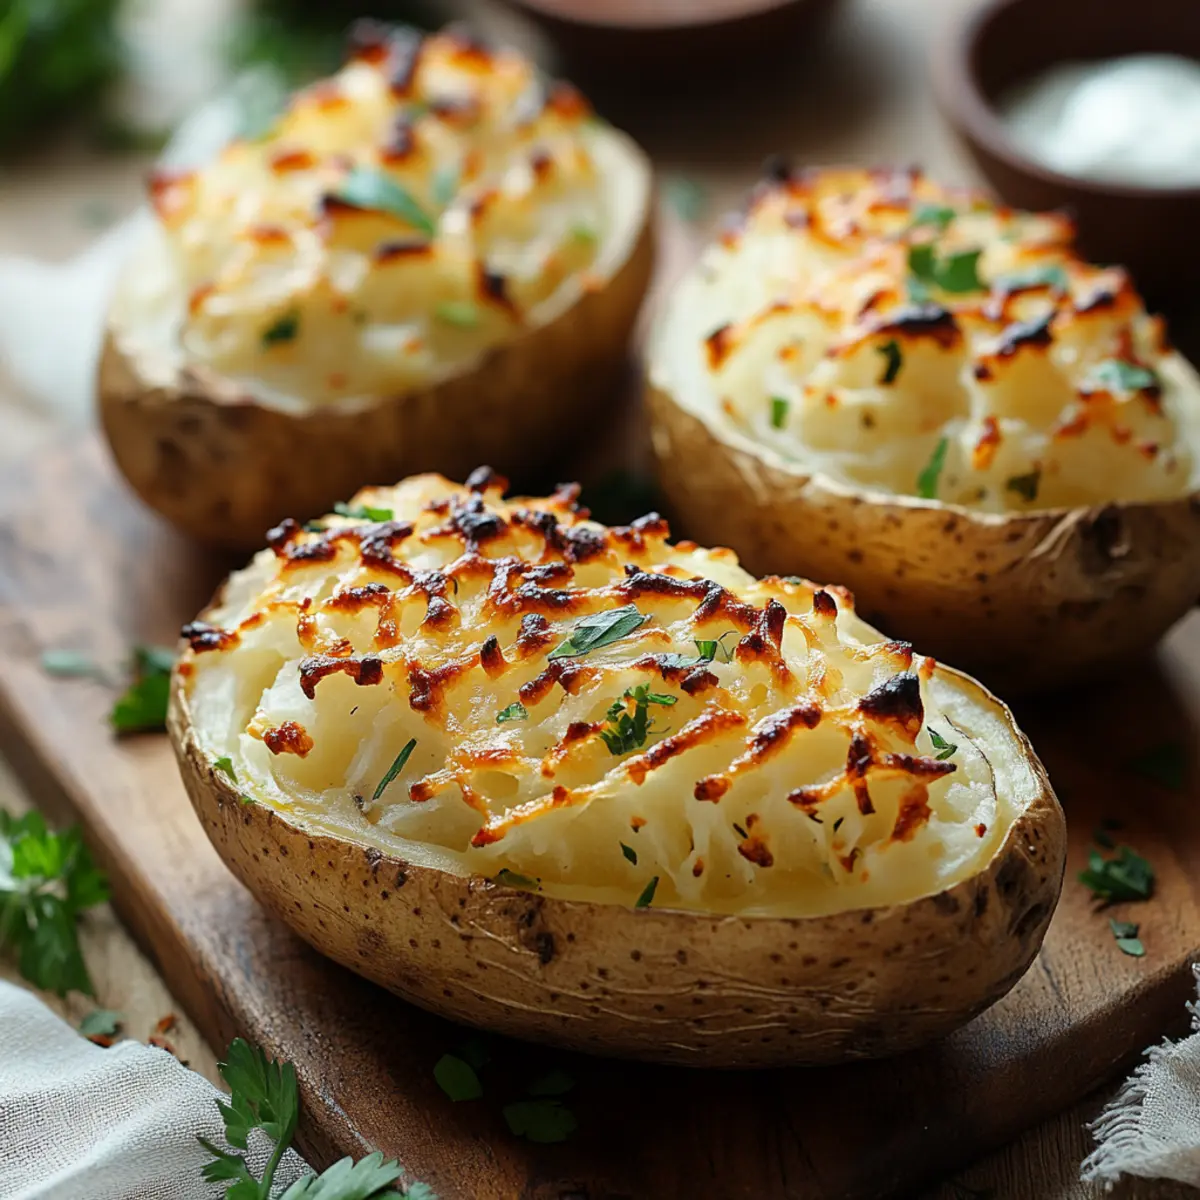
As I sank my fork into the first crispy, golden layer of my baked potato, the anticipation was palpable. There’s something profoundly satisfying about preparing the Perfect Baked Potato—where a rustic russet transforms into a comforting side dish or a satisfying main event. This recipe not only delivers a scrumptious meal but also shines in its simplicity, allowing for a world of customizable toppings that cater to every palate. Whether you’re craving a fluffy interior topped with rich sour cream or a healthier version laden with sautéed veggies, this baked potato is your blank canvas. Plus, it’s a gluten-free option that comes together in no time, making it a weeknight winner. With an easy-to-follow method that achieves that coveted crispy skin without foil, are you ready to elevate your dinner table with this classic favorite?
Why is this baked potato irresistible?
Crispy Perfection: The oven method creates a perfectly crispy skin that you’ll crave again and again.
Fluffy Delight: Inside, each potato is delectably fluffy, providing a wonderful contrast to the crunchy exterior.
Customizable Toppings: From classic butter and sour cream to adventurous chili or sautéed veggies, your choices are endless!
Quick and Easy: This recipe comes together in about an hour, making weeknight dinners a breeze.
Gluten-Free Goodness: Ideal for those looking for gluten-free options, it pairs well with just about any meal.
Crowd-Pleaser: Whether it's a family dinner or a casual get-together, everyone will love these baked potatoes!
Baked Potato Ingredients
Experience the magic of a perfectly cooked baked potato with these essential ingredients.
For the Potatoes
• Russet Potatoes – The star of the show, these provide that classic fluffy texture.
• Extra-Virgin Olive Oil – Adds flavor and helps achieve that irresistible crispy skin; any neutral oil works as a substitute.
• Kosher or Coarse Sea Salt – A must for enhancing skin flavor; coarse creates a delightful crunch.
• Freshly Ground Black Pepper – Season to taste for that extra zing.
Optional Toppings
• Butter – Rich and creamy, it’s a classic favorite to enhance flavor.
• Sour Cream – Adds a tangy creaminess that pairs perfectly with fluffy potatoes.
• Shredded Cheese – Melts beautifully over the warm potato, adding richness.
• Chili – A hearty option for a protein-packed twist!
• Sautéed Vegetables – Healthier toppings that bring texture and color to your dish.
• Greek Yogurt – A lighter alternative to sour cream, offering a tart flavor boost.
Now you're ready to create the ultimate baked potato that’s full of possibilities!
Step‑by‑Step Instructions for Perfect Baked Potato
Step 1: Preheat the Oven
Begin by preheating your oven to 400–425°F (200–220°C). The temperature can vary slightly based on the size of your russet potatoes, so choose the higher end for larger ones. This step is essential to ensure that you achieve that coveted crispy skin and fluffy interior in your perfect baked potato.
Step 2: Prepare the Potatoes
While the oven heats, scrub each russet potato under cool, running water to remove any dirt. Once clean, dry them thoroughly with a kitchen towel. This will help the olive oil adhere better and promote that deliciously crispy texture when baked. Make sure you select similar-sized potatoes for even cooking.
Step 3: Piercing the Potatoes
Next, take a fork and prick each potato several times about ½ inch deep. This action allows steam to escape during the baking process, preventing any unsightly bursts in the oven. As you pierce your potatoes, feel free to get creative with the pattern—it’s all part of the fun!
Step 4: Season the Potatoes
Now, rub each potato generously with extra-virgin olive oil, ensuring they’re well-coated for that crispy exterior. Sprinkle coarse kosher salt and freshly ground black pepper over the surface, creating a seasoned crust. This will elevate your baked potato's flavor tremendously, giving it that satisfying savory kick.
Step 5: Baking the Potatoes
Place your seasoned potatoes directly on the oven rack or on a large baking sheet. This allows air to circulate around them, contributing to an even bake. Let them bake for 50–60 minutes, or until they feel tender when poked with a fork and the internal temperature reaches 205–210°F, resulting in the perfect baked potato.
Step 6: Fluff the Potatoes
Once fully baked, carefully remove the potatoes from the oven using oven mitts. To add that signature fluffiness, slice each potato open lengthwise and gently squeeze the sides to puff the interior. This is where you can truly appreciate that soft, cloud-like texture that makes the perfect baked potato so irresistible.
Expert Tips for the Best Baked Potato
-
Choose Wisely: Use medium-sized Russet potatoes for even cooking. Selecting similar-weight potatoes ensures they all bake perfectly together.
-
Crispy Skin Alert: For an extra-crispy skin, raise the oven temperature for the last 5–10 minutes, or switch on the broiler briefly—just keep an eye on them!
-
No Foil, Please: Avoid wrapping your potatoes in foil. This traps steam, creating a soggy skin instead of that delightful crispiness we love with a baked potato.
-
Pierce with Care: Remember to prick the potatoes before baking! This allows steam to escape, preventing any messy explosions in the oven.
-
Storing Leftovers: If you have any leftover baked potatoes, store them in an airtight container for up to 3–4 days. Reheat in the oven or microwave for a quick meal.
-
Topping Ideas: Get creative with toppings! Consider chili, sautéed veggies, or Greek yogurt to customize your baked potato while boosting nutrition.
Storage Tips for Baked Potato
Room Temperature: Store baked potatoes at room temperature for up to 2 hours. Beyond that, it’s best to refrigerate to maintain freshness.
Fridge: Keep leftover baked potatoes in an airtight container for up to 3–4 days. This prevents them from drying out and helps preserve flavor.
Freezer: For longer storage, you can freeze baked potatoes. Wrap them tightly in plastic wrap and then place them in a resealable freezer bag; they’ll last up to 3 months.
Reheating: Reheat in the oven at 350°F (175°C) for about 20 minutes or in the microwave for 2-3 minutes until heated through. Enjoy your baked potato like it was just made!
What to Serve with Perfect Baked Potato
The Perfect Baked Potato is a delightful canvas that opens the door to endless meal possibilities, making your dinner a true experience.
-
Creamy Coleslaw: The crunchy texture of coleslaw adds a refreshing contrast and balances out the warmth of the baked potato. It's a great way to enhance your meal with an extra serving of veggies.
-
Grilled Chicken: Juicy grilled chicken brings protein to the table, perfectly complementing the fluffy potato without overshadowing its delicious flavor. A light marinade with herbs works wonders!
-
Sautéed Spinach: With its earthy flavor and vibrant color, sautéed spinach adds a nutritious touch. Toss it with garlic for an aromatic boost that pairs beautifully with the potatoes.
-
Chili: A hearty chili atop your baked potato transforms it into a filling meal. The spicy, savory notes elevate the entire dish, creating a satisfying feast.
-
Fresh Garden Salad: A simple toss of greens, tomatoes, and cucumbers with a light vinaigrette breathes freshness into your meal, balancing the potatoes' richness.
-
Roasted Vegetables: Caramelized, roasted seasonal vegetables offer a sweet, savory addition. Their roasted, slightly crispy texture beautifully complements the soft baked potato.
-
Cheesy Broccoli: Rich, melted cheese over steamed broccoli adds a creamy texture and makes the dish more indulgent—perfect for when you're craving comfort food.
-
Sparkling Lemonade: Stay refreshed with a glass of sparkling lemonade or iced tea. The bright, citrusy notes cut through the potato's richness, leaving you feeling invigorated.
Make Ahead Options
These Perfect Baked Potatoes are ideal for meal prep, allowing you to save time and enjoy deliciousness throughout the week! You can wash and pierce the russet potatoes and refrigerate them for up to 24 hours before baking. To maintain their quality, ensure they are well-dried after washing to avoid moisture buildup. When you're ready to serve, simply follow the baking instructions and enjoy that crispy skin and fluffy interior just as if they were made fresh! Additionally, consider preparing your favorite toppings, like sautéed vegetables or shredded cheese in advance and store them separately for the best texture and flavor when assembling your meal. This way, you'll have a satisfying and customizable dish ready to go, perfect for busy nights!
Baked Potato Variations & Substitutions
Feel free to get creative and customize your baked potato adventure with these delightful variations!
-
Sweet Potatoes: Swap russets for sweet potatoes and adjust baking time for a nutritious, sweeter twist.
-
Cheesy Bliss: Top with your favorite cheese blend before serving to melt into gooey perfection, enhancing flavor.
-
Plant-Based: Use avocado oil for a vegan option and top with cashew cream for a healthy, rich alternative to sour cream.
-
Heat It Up: Sprinkle chili flakes or add jalapeños for a spicy kick that brings excitement to every bite.
-
Garlic Lovers: Infuse your olive oil with garlic before rubbing on potatoes for a fragrant twist that’s simply irresistible.
-
Loaded Potato: Make it a meal by piling on toppings like sautéed mushrooms, broccoli, and buffalo chicken for an indulgent feast!
-
Herbal Touch: Add fresh herbs like rosemary or chives as a topping for a burst of fresh flavor and color.
-
Nutty Flavor: Incorporate a drizzle of tahini or almond butter after baking for a creamy, nutty contrast that’s delicious!
Perfect Baked Potato Recipe FAQs
What type of potatoes should I use for the best baked potato?
Absolutely, the best choice is medium-sized Russet potatoes! They're high in starch and perfect for achieving that fluffy interior while providing a crispy skin. Look for potatoes that are similar in size to ensure even cooking, and avoid any with dark spots or blemishes.
How long can I store my leftover baked potatoes?
Leftover baked potatoes can be stored in an airtight container in the refrigerator for up to 3–4 days. Make sure they cool down to room temperature before sealing them up—this helps avoid moisture build-up, which can make them soggy.
Can I freeze my baked potatoes, and how?
Yes, you can freeze baked potatoes! First, let them cool completely. Then, wrap each potato tightly in plastic wrap and place them in a resealable freezer bag. They will stay fresh for up to 3 months. When you're ready to enjoy, thaw them overnight in the fridge and reheat in the oven at 350°F (175°C) for about 20 minutes or in the microwave for 2-3 minutes.
What should I do if my baked potatoes burst in the oven?
If your baked potatoes burst, don't worry; it happens! Often, it's due to not piercing them enough. Always prick your potatoes several times with a fork (about ½ inch deep) before baking to allow steam to escape. If they do burst, you can still salvage the insides for a delicious mashed potato or a creamy side dish.
Are baked potatoes gluten-free?
Absolutely! Baked potatoes are inherently gluten-free, making them a great option for those following a gluten-free diet. Just be cautious with your toppings—ensure any additional ingredients, like sauces or cheeses, are also gluten-free.
What are some healthy topping options for my baked potato?
Very! Toppings can truly elevate your baked potato. Consider options like sautéed vegetables, Greek yogurt for a creamy texture with fewer calories, or even black beans for added protein and fiber. You can also sprinkle fresh herbs for an extra burst of flavor without the extra calories!
The Ultimate Baked Potato: Crispy, Fluffy, and Irresistible
Ingredients
Equipment
Method
- Preheat the oven to 400–425°F (200–220°C).
- Scrub each russet potato under cool water and dry them thoroughly.
- Prick each potato several times with a fork about ½ inch deep.
- Rub each potato with olive oil, then sprinkle with salt and pepper.
- Bake the potatoes directly on the oven rack or a baking sheet for 50–60 minutes.
- After baking, slice each potato open lengthwise and gently squeeze to fluff the interior.

Leave a Reply