
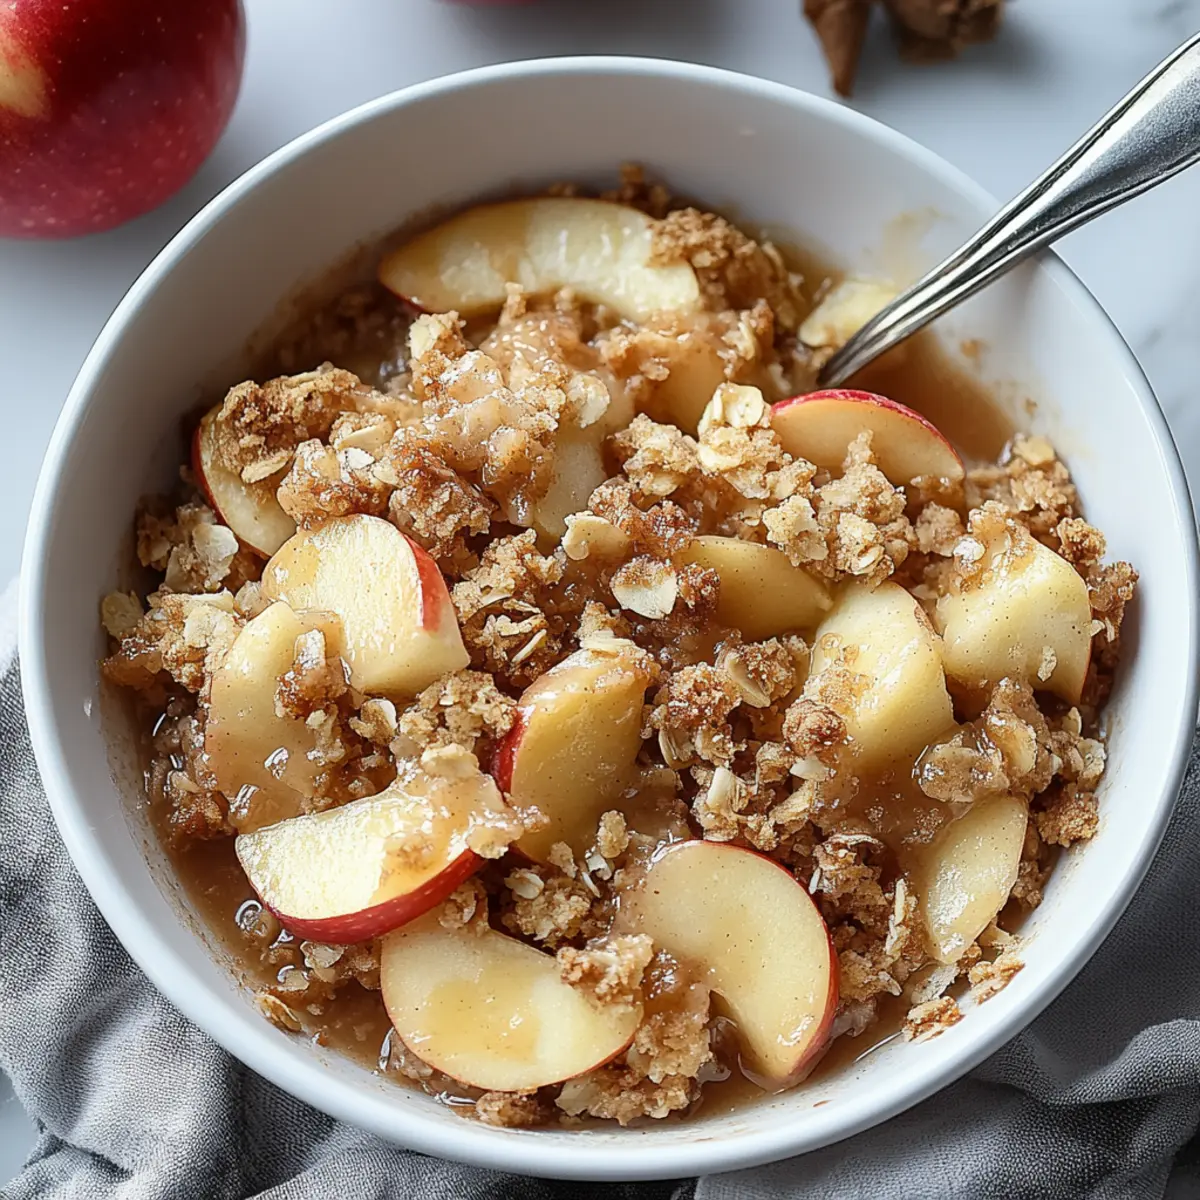
As the aroma of cinnamon wafts through the kitchen, I can't help but feel a wave of nostalgia. This Classic Cinnamon-Spiced Apple Crisp has a way of turning an ordinary evening into something special, whether it's a cozy weeknight treat or a centerpiece dessert for gatherings. The beauty of this apple crisp lies not just in its warm, inviting flavors, but also in its simplicity—it's so easy to throw together! Plus, with gluten-free and vegan adaptations, you can cater to everyone's needs without missing out on that delightful crunchy oat topping. Who wouldn’t want to cozy up with a bowl of this comforting dish? Ready to whip up a batch for yourself—or maybe share it with someone special? Let's get started!
What makes this Apple Crisp irresistible?
Warm, welcoming aroma: The scent of cinnamon and baked apples fills your kitchen, creating an inviting atmosphere that draws everyone in.
Crowd pleaser: Perfect for gatherings or family dinners, this dish is loved by adults and kids alike!
Adaptable and versatile: Whether you prefer a vegan or gluten-free option, you'll find simple substitutions that cater to your dietary needs without sacrificing flavor.
Speedy dessert: In just under an hour, you can enjoy a homemade dessert that's both satisfying and delicious!
Comfort food at its finest: The combination of tender apples with a crunchy oat topping makes every bite a delightful experience that evokes warmth and memories. Whether topped with vanilla ice cream or enjoyed alone, this apple crisp is sure to become a favorite in your home!
Apple Crisp Ingredients
• Here’s what you need to create this delightful dish!
For the Filling
- Apples – The star ingredient that brings sweetness and structure; try a mix for varied flavors!
- Lemon Juice – Keeps those apples from browning; essential for freshness!
- Light Brown Sugar – Enhances the fruity flavor; can swap with coconut sugar for a unique touch.
- Ground Cinnamon – Infuses warmth and nostalgia; nutmeg can be used for a different spice twist.
For the Topping
- All-Purpose Flour – Creates a crumbly topping; gluten-free flour works wonderfully for a gluten-free version.
- Quick-Cooking or Rolled Oats – Adds that signature crunch; opt for gluten-free oats for those dietary needs.
- Unsalted Butter – Binds the mixture and adds richness; substitute with plant-based butter for a vegan adaptation.
Enjoy making your very own Apple Crisp with these simple ingredients!
Step‑by‑Step Instructions for Apple Crisp
Step 1: Preheat and Prep
Begin by preheating your oven to 350°F (175°C) and buttering a 2-quart baking dish to prevent sticking. This will ensure that your Apple Crisp bakes evenly and doesn't cling to the pan. As the oven warms up, prepare your workspace by gathering all the ingredients and mixing bowls you'll need for the next steps.
Step 2: Make the Oat Topping
In a large mixing bowl or food processor, combine the all-purpose flour, light brown sugar, and a pinch of salt. Add cold, cubed unsalted butter and mix until the mixture resembles coarse crumbs, taking about 3–5 minutes. Once crumbly, stir in the quick-cooking or rolled oats, blending well to create an even oat topping that will become perfectly crispy during baking.
Step 3: Prepare the Apples
Peel, core, and slice about 6 cups of apples into thin wedges. You can use a combination of sweet and tart apple varieties for the best flavor. In a separate bowl, toss the apple slices with lemon juice, light brown sugar, and ground cinnamon until the apples are evenly coated. This will enhance their flavor and keep them vibrant.
Step 4: Assemble the Apple Crisp
Spread the prepared apple mixture evenly into the buttered baking dish, ensuring all slices are well-distributed. Then, take your oat topping and sprinkle it generously over the apples, covering them completely. This crust will form a delightful, crunchy layer that contrasts beautifully with the tender, spiced apples beneath.
Step 5: Bake Until Golden
Place the assembled Apple Crisp in the preheated oven and bake for 40 to 50 minutes. You’ll know it’s ready when the apples are tender and the topping is a lovely golden brown. If necessary, cover with foil and bake for an additional 10 minutes to ensure the apples are softened to perfection.
Step 6: Cool and Serve
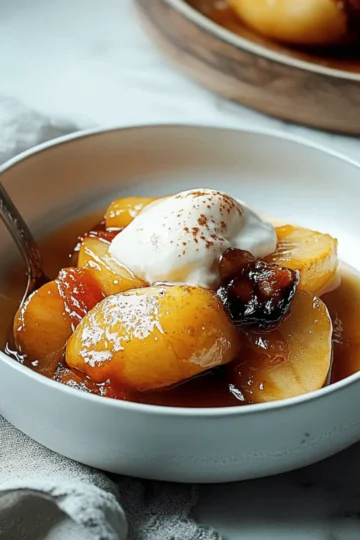
Once baked, remove the Apple Crisp from the oven and allow it to cool for about 10-15 minutes. This cooling period helps the juices set up a bit. Serve warm, ideally topped with a scoop of vanilla ice cream or a dollop of whipped cream to elevate this cozy dessert experience!

Make Ahead Options
These Apple Crisp delights are perfect for meal prep enthusiasts! You can assemble the entire dish up to 24 hours in advance without baking. Simply prepare the apple filling and the oat topping separately, then refrigerate them in airtight containers. This will keep the apples fresh and prevent browning, while the oat topping stays ready to go. When you're ready to serve, simply spread the apple mixture in your baking dish, sprinkle the oat topping on top, and bake according to the instructions. You’ll still achieve that warm, comforting flavor that makes this Apple Crisp a family favorite with minimal effort!
What to Serve with Classic Cinnamon-Spiced Apple Crisp
As the warm notes of cinnamon and sweet apples fill the air, consider delightful companions to elevate your Apple Crisp experience.
- Vanilla Ice Cream: A classic pairing! The creamy richness contrasts beautifully with the crunchy topping and warm apples.
- Whipped Cream Delight: Light, fluffy whipped cream adds a cloud-like texture that enhances the cozy feel of the dish.
- Caramel Sauce Drizzle: A sweet and rich addition; pour it over the Apple Crisp for a luxurious touch that feels indulgent.
For a heartwarming meal, serve alongside:
- Savory Roasted Brussels Sprouts: Their slight bitterness and crispy edges provide a lovely balance to the sweetness of the dessert.
Start your gathering with:
- Pecan Pie Bars: These sweet treats echo the nutty notes in the Apple Crisp and create a delightful dessert table.
Why not sip on:
- Hot Apple Cider: The spiced warmth of apple cider will perfectly complement the cinnamon essence of your Apple Crisp.
These pairings promise to create a magical dining experience that lingers long after the last spoonful!
How to Store and Freeze Apple Crisp
Fridge: Store leftover Apple Crisp in an airtight container for up to 3 days. This helps maintain its flavor while keeping the topping crispy for a short period.
Freezer: Allow the Apple Crisp to cool completely, then wrap it tightly in plastic wrap or aluminum foil before placing it in a freezer-safe container. It can be frozen for up to 3 months.
Reheating: For best results, reheat individual portions in the microwave, or warm the entire dish in the oven at 350°F (175°C) for 15-20 minutes until heated through.
Make-Ahead Tip: You can assemble the Apple Crisp a day in advance and keep it covered in the refrigerator before baking. Just pop it in the oven when you're ready to serve!
Apple Crisp Variations & Substitutions
Feel free to explore these delightful twists on your apple crisp to cater to your unique tastes and dietary preferences!
-
Gluten-Free: Use a gluten-free flour blend in place of all-purpose flour for a delicious gluten-free treat. This ensures everyone can enjoy it without missing out on flavor.
-
Vegan: Swap unsalted butter with plant-based butter or coconut oil to create a luscious vegan version. Trust me, you won't even miss the dairy in this comforting dessert!
-
Nuts Galore: Add a handful of chopped pecans or walnuts to the oat topping for added crunch and flavor. Nuts can elevate the texture and add a satisfying bite, making each scoop even more enjoyable.
-
Spicy Twist: Mix in a pinch of nutmeg or ginger with the cinnamon for an exciting flavor boost. The warmth of these spices adds depth and character to your apple crisp.
-
Fruity Fun: Incorporate dried fruits like cranberries or raisins into the filling for an unexpected burst of sweetness. These little gems provide an incredible contrast to the tender apples.
-
Coconut Love: For a tropical flair, mix in some shredded coconut into the oat topping. It creates a chewy texture and a hint of sweetness that pairs beautifully with the apples.
-
Apple Variety Mix: Use a blend of tart and sweet apples—think Granny Smith and Honeycrisp—for a more complex flavor profile. This will delight your taste buds, combining both tartness and sweetness in each delicious bite.
Each of these variations invites you to get creative while preparing your apple crisp. Enjoy the journey of making it your own, and don’t forget—sharing it with loved ones makes it even more special. And for more comforting dessert ideas, check out my delicious Cinnamon Roll Recipe or consider trying this Warm Brownie Sundae that complements your apple crisp perfectly!
Helpful Tricks for Apple Crisp
• Cold Butter Magic: Using cold butter is essential for that perfect crispy crumble; this technique keeps the topping from becoming soggy during baking.
• Apple Slice Thickness: For evenly cooked apples, ensure your slices are uniformly thick around ¼ inch; uneven sizes lead to mushy or crunchy bites.
• Avoid Overmixing: When combining oats and topping ingredients, mix just until crumbly. Overmixing can create a dense texture rather than a light, crunchy topping.
• Creative Substitutions: Feel free to experiment with different apple varieties or spices; mix sweet and tart varieties for the best flavor depth in your Apple Crisp.
• Rest Before Serving: Allow the Apple Crisp to cool for about 10–15 minutes after baking, which helps the filling set up and makes serving easier.

Apple Crisp Recipe FAQs
What kind of apples are best for making Apple Crisp?
For the best flavor, I recommend using a mix of apples! Try combining tart Granny Smith apples with sweet Fuji or Honeycrisp apples. This variety will give you a balanced flavor profile that stands out, ensuring each bite is deliciously complex.
How should I store leftovers of Apple Crisp?
Store your leftover Apple Crisp in an airtight container in the refrigerator for up to 3 days. Make sure it's covered well to maintain its moisture without sacrificing that crunchy topping. You can also reheat it in the microwave or enjoy it cold if you’re in a hurry!
Can I freeze Apple Crisp?
Absolutely! After allowing it to cool completely, wrap the Apple Crisp tightly in plastic wrap or aluminum foil, then place it in a freezer-safe container. It can be frozen for up to 3 months. When you're ready to enjoy it, simply thaw in the fridge overnight and reheat in the oven at 350°F (175°C) for about 15-20 minutes.
How do I make this Apple Crisp gluten-free?
To easily adapt this recipe for gluten-free diets, substitute the all-purpose flour with a gluten-free flour blend and use certified gluten-free oats. This way, you can still enjoy that crunchy oat topping without compromising on flavor or texture!
What can I do if my topping doesn't turn out crumbly?
If your oat topping isn't crumbly, it might be because the butter was too warm or because you overmixed it. To fix this, try using cold butter and avoid mixing too much—just blend until you have coarse crumbs. For a crunchier texture, you can add more oats or chopped nuts to the mixture too!
Can I make Apple Crisp vegan?
Yes, you can easily make this Apple Crisp vegan by substituting the unsalted butter with plant-based butter or coconut oil. This swaps out the dairy while keeping the delicious, rich flavor intact—perfect for vegan diets!

Irresistibly Cozy Apple Crisp That Everyone Will Love
Ingredients
Equipment
Method
- Preheat your oven to 350°F (175°C) and butter a 2-quart baking dish.
- In a mixing bowl, combine all-purpose flour, light brown sugar, and salt. Add cubed butter and mix until crumbly, then stir in oats.
- Peel, core, and slice apples. Toss with lemon juice, brown sugar, and cinnamon.
- Spread apple mixture in baking dish and top with oat mixture.
- Bake for 40-50 minutes until apples are tender and topping is golden brown.
- Cool for 10-15 minutes before serving, preferably with ice cream.


Leave a Reply