
The aroma of cinnamon and baked apples fills the air, transporting me to cozy autumn days spent at home. Today, I’m excited to share my delicious Apple Hand Pies, a classic dessert that’s conveniently portable and easy to make. These charming little pockets of joy are perfect for gatherings or as a delightful snack on the go. With the flexibility to personalize fillings and crusts, you can create a delightful twist on this seasonal treat. Plus, they’re a crowd-pleaser, making them an ideal way to celebrate fall flavors with family and friends. Have you ever thought about how comforting a warm pie can be? Let's dive into the simple steps to bring these delightful Apple Hand Pies to life!

Why Are Apple Hand Pies So Irresistible?
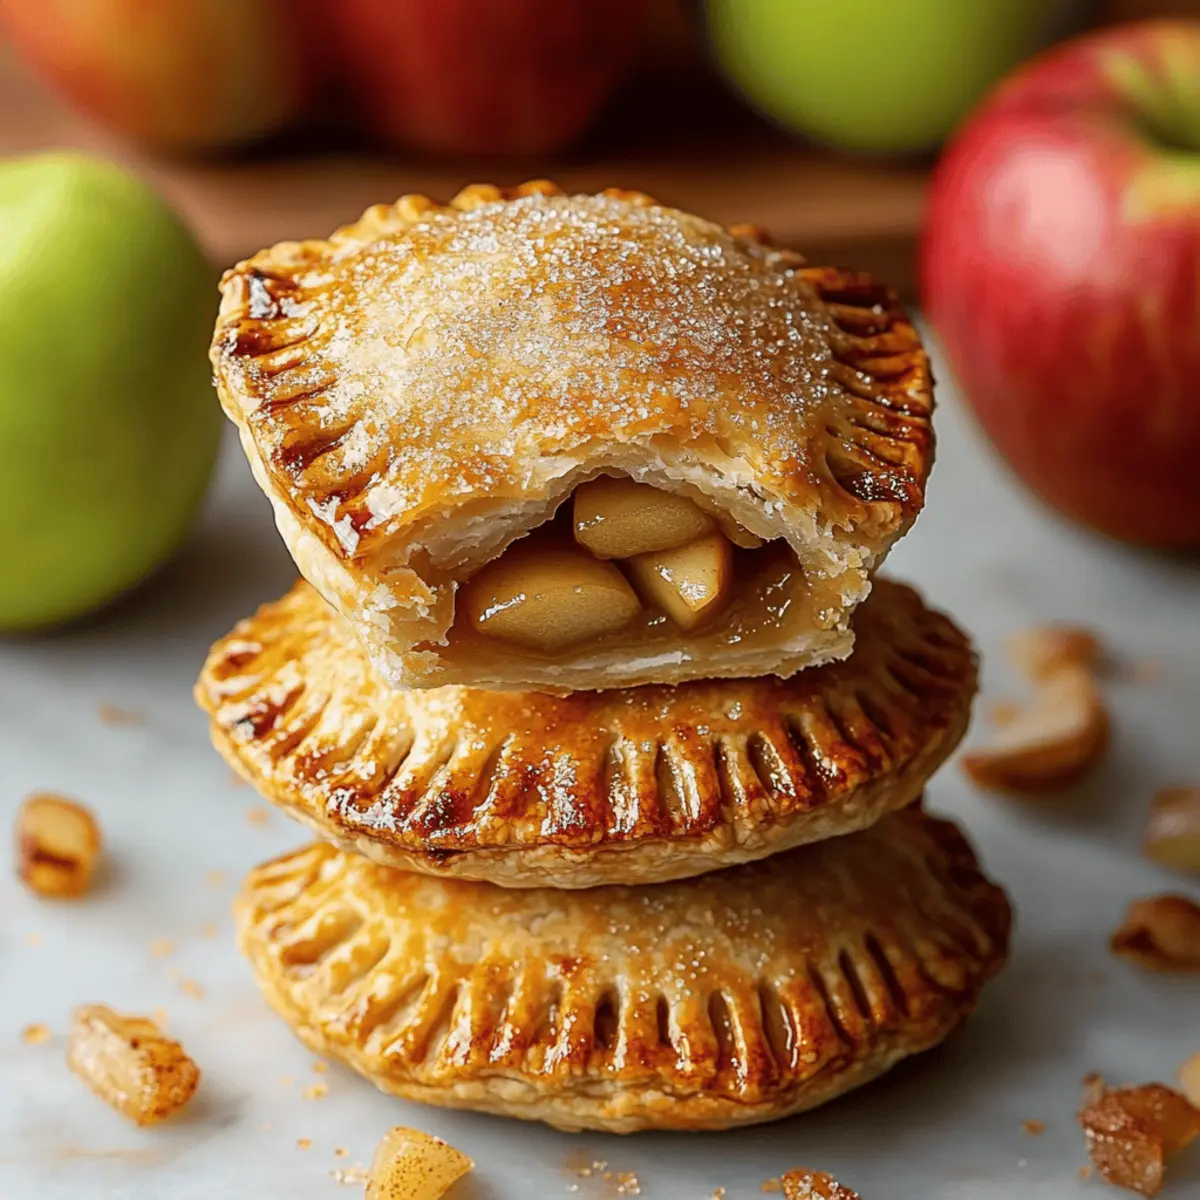
Warm, Comforting Bites: There’s nothing quite like the cozy embrace of freshly baked Apple Hand Pies. Customizable Fillings: Whether you prefer traditional apple or want to experiment with pears and dried fruits, the options are endless! Baked to Perfection: The flaky crust delivers a satisfying crunch with every bite, complementing the sweet spiced filling beautifully. Perfect for Sharing: These portable treats are great for parties or picnics, making sharing a breeze. Plus, they pair wonderfully with a scoop of vanilla ice cream or a dusting of powdered sugar—perfect for a delightful end to any meal!
Apple Hand Pie Ingredients
• Get ready to savor these delightful bites with essential ingredients!
For the Pie Crust
- Pie Crust – Use store-bought or make your own for a flaky exterior that hugs the filling.
For the Apple Filling
- Apples – Choose firm varieties like Granny Smith or Honeycrisp for a flavorful and textured filling.
- Sugar – Adjust to taste; sweeter apples may need less sugar for the perfect balance.
- Flour – Helps thicken the filling, ensuring every bite is luscious without being runny.
- Cinnamon – Adds that warm spiced note that perfectly complements the apples in your Apple Hand Pies.
- Nutmeg – This ground spice enhances the warmth and flavor profile; feel free to experiment with other spices!
- Vanilla Extract – A splash enhances the overall apple flavor and adds a delightful depth.
- Butter – Adds richness; small cubes placed on the apple mixture boost the filling's creaminess.
For the Egg Wash
- Egg – Brush on the edges for a beautiful golden brown finish; substitute milk if you’re out of eggs.
To Finish
- Coarse Sugar – Optional, but a sprinkle on top adds a delightful crunch and sweetness when baked.
Now that you have your ingredients ready, you’re one step closer to whipping up these charming Apple Hand Pies!
Step‑by‑Step Instructions for Easy Cinnamon-Spiced Apple Hand Pies
Step 1: Preheat and Prepare
Begin by preheating your oven to 400°F (204°C). While the oven heats, line your baking sheets with parchment paper to prevent sticking and ensure easy cleanup. This step sets the stage for your delightful Apple Hand Pies, making sure you have a smooth baking experience right from the start.
Step 2: Roll Out the Dough
On a lightly floured surface, roll out your pie crust to a thickness of ⅛-inch. Using a round cutter, cut the dough into 3.5-inch circles—this will be the base for your Apple Hand Pies. Once cut, place the circles in the refrigerator to chill while you prepare the spiced apple filling, keeping the dough nice and firm.
Step 3: Make the Apple Filling
In a large mixing bowl, combine your chopped apples with sugar, flour, cinnamon, nutmeg, and vanilla extract. Toss everything together until the apples are well-coated in the mixture. This is where the magic begins, as the flavors meld to create a deliciously spiced filling that will turn your Apple Hand Pies into a delightful treat.
Step 4: Assemble the Hand Pies
Take half of the chilled dough circles and place a spoonful of the apple filling in the center of each. Dot the filling with small cubes of butter for extra richness, but remember to leave some space around the edges for sealing! This is where your Apple Hand Pies will come to life, brimming with flavor in each bite.
Step 5: Seal the Pies
Brush the edges of each filled dough circle with the egg wash, which will help create a strong seal. Carefully place the remaining dough circles on top and gently press the edges to seal. Use a fork to crimp the edges, giving them a decorative touch while ensuring no filling escapes during baking.
Step 6: Prepare for Baking
Lightly brush the tops of the sealed Apple Hand Pies with the remaining egg wash to achieve a beautiful golden color. If you'd like, sprinkle coarse sugar on top for added sweetness and crunch. Lastly, cut 2-3 small slits in each pie’s top for steam to escape while baking, keeping the crust perfectly flaky.
Step 7: Bake to Perfection
Place the assembled Apple Hand Pies in your preheated oven and bake for 18-22 minutes. Watch as they turn golden brown and the filling starts bubbling up charmingly through the slits. Your kitchen will soon fill with the comforting aroma of baked apples and cinnamon—a true hallmark of autumn!
Step 8: Cool and Serve
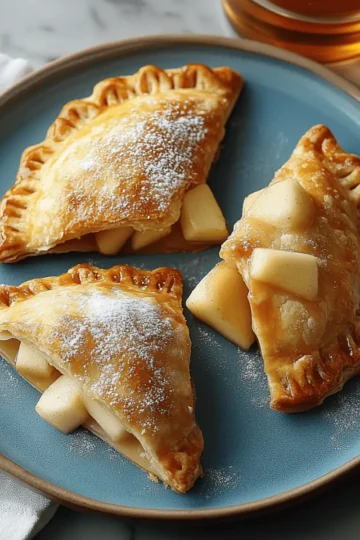
Once baked, remove your Apple Hand Pies from the oven and let them cool on a wire rack for a few minutes. This allows the filling to set slightly. They are best enjoyed warm, so gather your family or friends, serve them with a sprinkle of powdered sugar or a scoop of vanilla ice cream, and relish in the joy of homemade treats!
What to Serve with Easy Cinnamon-Spiced Apple Hand Pies
There's nothing quite like a cozy gathering filled with delicious flavors and comforting treats that bring everyone together.
- Vanilla Ice Cream: A scoop of creamy vanilla ice cream adds a rich contrast, melting into the warm filling for a blissful experience.
- Whipped Cream: Light and airy, whipped cream provides a delightful topping that enhances the sweet spices in the apple filling.
- Powdered Sugar: A light dusting on top offers a lovely sweetness and a charming presentation, enhancing the delightful appearance.
- Chai Tea: The warm, aromatic spices of chai tea pair beautifully with the cinnamon in apple hand pies, enhancing the cozy atmosphere.
- Coffee: A cup of freshly brewed coffee balances the sweetness and brings warmth, making this a perfect afternoon treat.
- Fresh Fruit Salad: A refreshing fruit salad adds a vibrant and healthy note, beautifully contrasting with the rich flavors of the hand pies.
- Caramel Sauce: Drizzling warm caramel sauce on top introduces an indulgent touch that complements the spiced apple filling perfectly.
- Ginger Beer: This fizzy, spicy drink provides a refreshing contrast that cleanses the palate between bites of the sweet pies.
- Chocolate Sauce: For the chocolate lovers, a drizzle of rich chocolate sauce elevates your hand pies into a decadent dessert.
Make Ahead Options
These Apple Hand Pies are perfect for meal prep enthusiasts! You can prepare the pie crust and filling up to 24 hours in advance to save precious time during your busy week. Simply follow the instructions for the filling and refrigerate it in an airtight container to maintain freshness. For the crust, roll it out and cut it into circles, then place them between sheets of parchment paper (to prevent sticking) and refrigerate. When you’re ready to bake, fill the chilled dough with the apple mixture and seal as instructed. This way, you'll have homemade goodness just as delicious as if you made them fresh on the spot, ready to impress your family or guests!
Storage Tips for Apple Hand Pies
-
Room Temperature: Allow your baked Apple Hand Pies to cool completely before storing them. Keep them in an airtight container at room temperature for up to 2 days.
-
Refrigeration: If you plan to keep the pies longer, place them in the fridge for up to 3 days in an airtight container. Enjoy them cold or warmed up!
-
Freezer: For longer storage, freeze assembled but unbaked Apple Hand Pies. Wrap each pie tightly in plastic wrap and place them in a freezer-safe bag. They can be frozen for up to 3 months.
-
Reheating: When ready to bake the frozen pies, preheat the oven to 400°F (204°C) and bake them directly from the freezer for about 20-25 minutes until golden and crisp.
Apple Hand Pies Variations & Substitutions
Feel free to get creative and customize these beloved Apple Hand Pies with delicious twists that suit your taste!
-
Dairy-Free: Replace butter with coconut oil or vegan butter for a creamy filling without dairy. This swap keeps the pies rich while accommodating dietary preferences.
-
Gluten-Free: Use a gluten-free pie crust made from almond flour or a pre-made gluten-free blend for a lighter option that still delivers on texture. Perfect for your gluten-sensitive friends!
-
Spicy Kick: Add a pinch of cayenne pepper or chili powder to the apple filling for a surprising warmth that complements the sweetness beautifully. It's an adventurous twist that may just become a favorite!
-
Nutty Boost: Mix in chopped walnuts or pecans for a delightful crunch and nutty flavor. This variation adds texture that's irresistible with every bite.
-
Seasonal Swap: Experiment with fillings by swapping apples for other fruits like ripe pears or tart cherries, adjusting sugar accordingly. Seasonal variations keep your hand pies fresh and exciting!
-
Baked with Love: Brush the crust with honey or maple syrup instead of an egg wash for a naturally sweet touch and a nice gloss. This unique finish elevates the visual appeal and flavor.
-
Herb Infusion: Incorporate a dash of fresh rosemary or thyme into your apple mixture for an unexpected herby touch that adds depth to the flavor profile. It’s the perfect blend of sweet and savory without overpowering!
-
Chocolate Delight: Surprise your family by adding dark chocolate chips to the apple filling for a decadent twist that will tantalize your taste buds. Chocolate and apples make a classic pairing that will steal the show.
If you're looking for more delightful partnerships or what pairs beautifully with these hand pies, consider serving them alongside a scoop of creamy vanilla ice cream or a drizzle of warm caramel sauce for that extra touch of sweetness. Enjoy making these festive treats your own!
Helpful Tricks for Apple Hand Pies
-
Apple Selection: Choose firm and tart apples like Granny Smith for a filling that holds its shape and balances sweetness perfectly.
-
Avoid Dry Filling: Make sure to coat your apples well with sugar and spices to avoid a dry filling inside your Apple Hand Pies.
-
Crimping Technique: Properly crimp the edges with a fork to seal the pies securely; this prevents the filling from leaking during baking.
-
Don't Overfill: Be careful not to overstuff the pies; leave space at the edges to ensure a strong seal and prevent bursting.
-
Perfect Baking: Monitor baking time closely; every oven is different, and you want your Apple Hand Pies golden brown and bubbling, not burnt.
Apple Hand Pies Recipe FAQs
What type of apples should I use for my apple hand pies?
Absolutely! For the best flavor and texture, choose firm, tart apples like Granny Smith or Honeycrisp. These varieties hold their shape during baking while providing a sweet-tart contrast that perfectly complements the warm spices.
How should I store leftover apple hand pies?
Once your Apple Hand Pies have cooled completely, store them in an airtight container at room temperature for up to 2 days. If you want to keep them longer, they can be refrigerated for up to 3 days or frozen for up to 3 months—perfect for enjoying later!
Can I freeze unbaked apple hand pies?
Yes, indeed! To freeze your assembled Apple Hand Pies, wrap each one tightly in plastic wrap and place them inside a freezer-safe bag. They’ll keep well for up to 3 months. When ready to bake, preheat your oven to 400°F (204°C) and bake the pies directly from frozen for about 20-25 minutes until golden and crisp.
What should I do if my pie crust is too soft to handle?
No worries! If your pie crust feels too soft or sticky, chill it in the refrigerator for 15-30 minutes. This helps firm up the dough, making it easier to roll and cut into circles. A cold crust prevents the butter from melting too soon, ensuring a flaky texture.
Can I use other fruits besides apples in this recipe?
The more the merrier! Feel free to add a mix of fruits like pears, peaches, or even dried fruits like cherries and cranberries for a unique spin. Just make sure to adjust the sugar and spices accordingly to create a balanced flavor profile for your filling.
Can my pets eat apple hand pies?
It’s important to keep apple hand pies away from pets. Ingredients like sugar and nutmeg can be harmful to animals. If you want to share a treat with your furry friends, give them a plain apple slice with no added sugars or spices!
Indulgent Apple Hand Pies That Steal the Autumn Show!
Ingredients
Equipment
Method
- Preheat your oven to 400°F (204°C) and line baking sheets with parchment paper.
- Roll out pie crust to ⅛-inch thickness and cut into 3.5-inch circles. Chill the circles.
- In a large mixing bowl, mix chopped apples, sugar, flour, cinnamon, nutmeg, and vanilla extract until coated.
- Place apple filling in the center of half the circles and dot with butter. Leave space around edges.
- Brush edges with egg wash, place remaining circles on top, and crimp edges with a fork.
- Brush tops with egg wash, optionally sprinkle with coarse sugar, and cut steam slits.
- Bake for 18-22 minutes until golden brown and filling is bubbly.
- Let cool for 5 minutes on a wire rack before serving.


Leave a Reply