
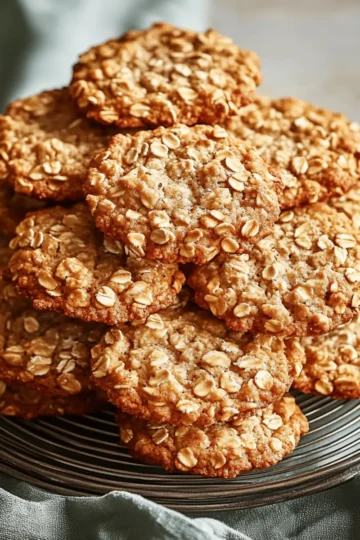
As I stared into my pantry, it hit me: the simplicity of three ingredients could create magic. That's when the idea for these Quick & Easy 3 Ingredient Peanut Butter Cookies struck. If you’re like me and often find yourself craving something sweet yet hassle-free, this recipe is your answer! With just peanut butter, sugar, and an egg, you’ll whip up gluten-free cookies that are both satisfying and quick to prepare. The best part? They’re an absolute crowd-pleaser, perfect for surprising guests or indulging on a cozy night in. Plus, with no need for fancy equipment or lengthy processes, you’ll have a delicious treat ready in under 15 minutes. Are you ready to dive into a world of chewy goodness? Let’s bake these delightful cookies together!
Why are these cookies so irresistible?
Simplicity at Its Finest: With just three ingredients, these Peanut Butter Cookies come together in a flash, making baking effortless and fun.
Gluten-Free Delight: Perfect for those with dietary restrictions, these cookies offer a delicious treat without any gluten worries.
Chewy and Satisfying: The rich peanut butter ensures an indulgent flavor that's hard to resist, providing that perfect chewy texture.
Versatile Options: Feel free to add your twist—mini chocolate chips or a sprinkle of sea salt can transform these cookies into gourmet delights!
Quick Baking Time: Ready in under 15 minutes, these cookies are the ideal choice for satisfying sudden sweet cravings or last-minute gatherings.
Kid-Friendly Fun: Make this a family activity! Kids will love helping to mix and shape the dough, making baking a shared joy.
Peanut Butter Cookies Ingredients
Get ready to whip up something delicious!
For the Cookies
- Peanut Butter – The star ingredient that provides rich flavor and chewy texture; opt for natural or creamy for the best results.
- Granulated Sugar – Sweetens the cookies while contributing to a crispy exterior; for a softer bite, you can switch to brown sugar.
- Egg – Binds the ingredients together and adds moisture; consider using a flax egg for a vegan-friendly version.
Enjoy these Peanut Butter Cookies that are not only simple but also packed with flavor!
Step‑by‑Step Instructions for Quick & Easy 3 Ingredient Peanut Butter Cookies
Step 1: Preheat the Oven
Begin by preheating your oven to 350°F (175°C). This ensures that the Peanut Butter Cookies will bake evenly and thoroughly. While the oven warms up, gather your mixing bowl and utensils. A spatula or a wooden spoon will work perfectly for combining the ingredients in the next steps.
Step 2: Mix the Ingredients
In a large bowl, combine the peanut butter, granulated sugar, and egg. Stir the mixture gently until just combined, being careful not to overmix; this helps maintain the chewy texture of the cookies. The dough should be smooth and slightly sticky, displaying a rich peanut butter color that tempts you to taste it right away!
Step 3: Scoop the Dough
Using a cookie scoop or your hands, portion the dough into golf ball-sized balls and place them on an ungreased baking sheet, spacing them about two inches apart. This spacing allows the cookies to expand as they bake while preventing them from sticking together. You should see a beautiful round shape that promises chewy goodness.
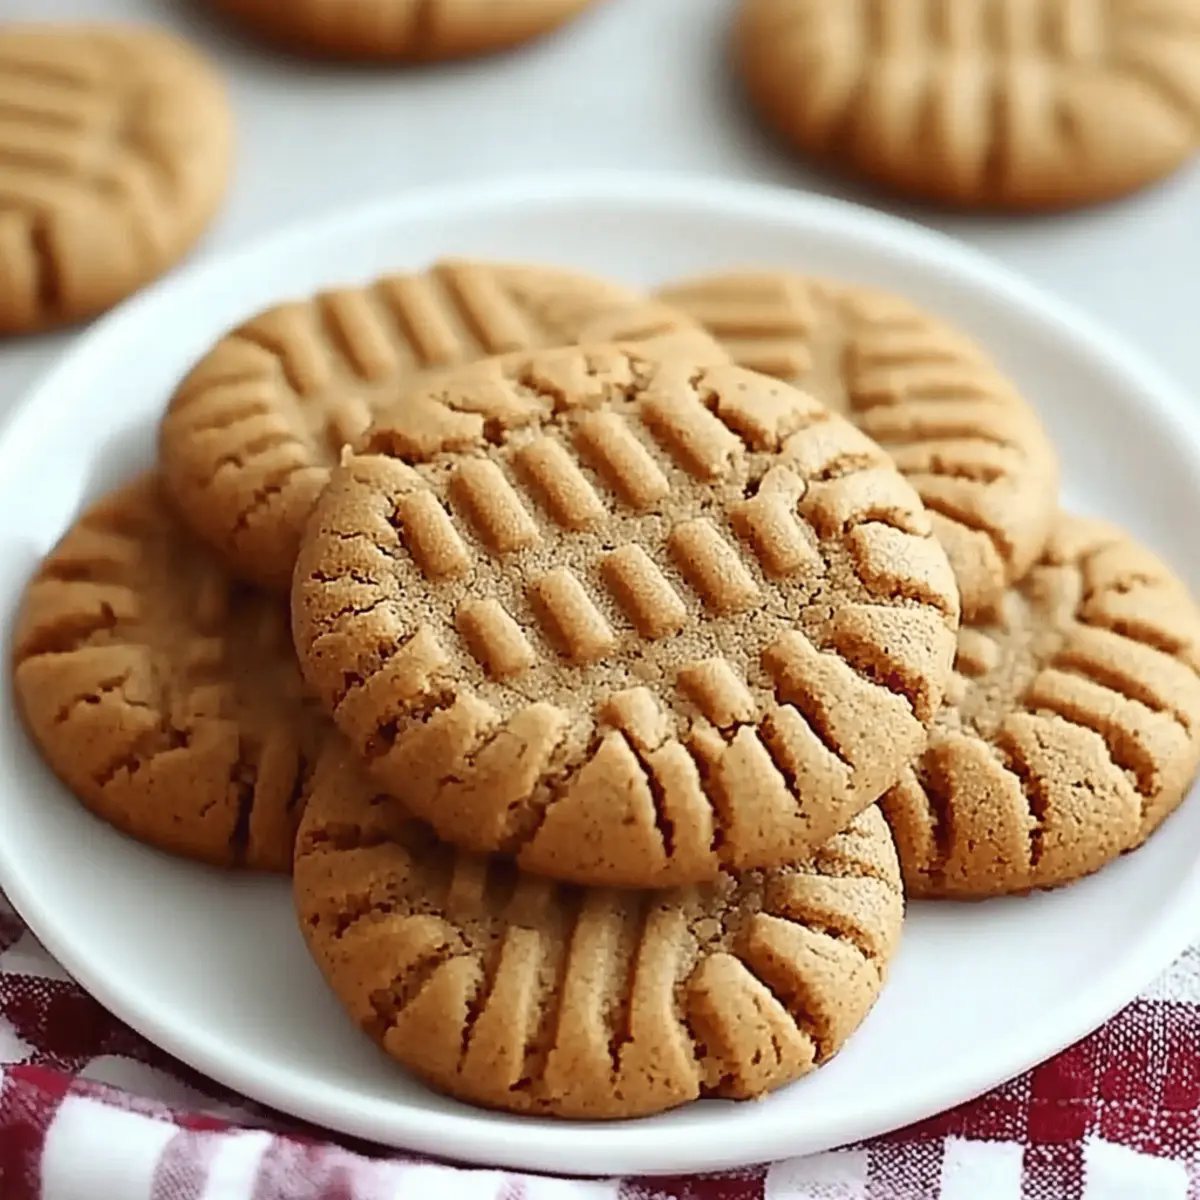
Step 4: Flatten with a Fork
Now it’s time to create that classic cookie appearance! Gently flatten each ball with a fork, making a crisscross pattern on the top. Ensure not to press too hard; a gentle touch will work just fine. The slight flattening will allow for even baking, creating golden edges and a soft center—just what you want for these delightful Peanut Butter Cookies.
Step 5: Bake to Perfection
Place the baking sheet in the preheated oven and bake for 8-10 minutes. Keep an eye on them towards the end of baking; the edges should be lightly golden while the centers remain soft. Remove them from the oven while they still look slightly underbaked, as they'll continue to firm up as they cool.
Step 6: Cooling Time
Let the cookies cool on the baking sheet for a few minutes before transferring them to a wire rack. This step is crucial as it allows them to set and develop that perfect chewy texture. Patience is key here—let those mouths wait for just a little longer to enjoy the warm, comforting flavors of your homemade Peanut Butter Cookies!
Peanut Butter Cookies: Creative Twists
Feel free to explore these variations to take your peanut butter cookies from ordinary to extraordinary, making each batch uniquely yours!
-
Nut-Free Option: Substitute sunflower seed butter for a nut-free alternative that’s just as delicious and easy to whip up. This twist ensures that everyone can enjoy the treats safely, making it great for school or gatherings.
-
Decadent Chocolate: Add mini chocolate chips to the dough for an extra layer of sweetness; the melty chocolate complements the peanut flavor perfectly. Imagine soft bites of peanut butter and pockets of gooey chocolate—a delightful combination!
-
Flavored Extracts: Experiment with vanilla or almond extract for a flavor boost. Just a teaspoon can elevate the taste profile, creating a luxurious touch that leaves everyone guessing what the secret ingredient is.
-
Crunchy Texture: Incorporate chopped nuts like walnuts or pecans for added crunch. This little change not only enhances the texture but also brings a delightful nutty flavor that pairs beautifully with peanut butter.
-
Sweet & Salty: Add a sprinkle of flaky sea salt on top before baking for a contrasting finish. This simple tweak transforms your cookies into a gourmet experience, balancing sweetness with a touch of savory flavor.
-
Vegan-Friendly: To make these cookies vegan, use a flax egg instead of a regular egg, maintaining all the chewiness with the same scrumptious flavor. Just mix one tablespoon of flaxseed meal with two and a half tablespoons of water and let it sit for a few minutes!
-
Customized Shape: Rather than round cookies, roll the dough into bars or shapes for a fun twist. Enjoy having them in different sizes while keeping the same wonderful flavor; it’s perfect for sharing!
These variations make it easy to adjust to your family's preferences or dietary needs. Why not take a moment to explore how each addition can bring new joy to your baking? For more delightful recipes, don’t forget to check out my guide on kid-friendly fun in the kitchen or some tips on baking perfect gluten-free treats. Enjoy the creativity!
What to Serve with Quick & Easy 3 Ingredient Peanut Butter Cookies
For a truly satisfying dessert experience, consider these delightful pairings that enhance the charm of your homemade cookies.
- Cold Glass of Milk: The classic favorite that balances the rich flavors, making each bite a delightful experience.
- Creamy Yogurt: A spoonful of Greek yogurt adds a tangy twist, creating a perfect contrast to the sweet, chewy cookies.
- Fresh Fruit Bowl: Sliced bananas or strawberries bring a refreshing touch, lightening up your dessert with natural sweetness.
- Ice Cream Scoop: A scoop of vanilla ice cream served alongside warm cookies melts into a dreamy combination that’s hard to resist.
- Hot Coffee or Tea: The warm, aromatic notes of coffee or tea perfectly complement the nuttiness, transforming snack time into a cozy ritual.
- Chocolate Drizzle: Drizzling melted chocolate over the cookies adds an indulgent flair, taking your treat to the next level of decadence.
Whether you choose a refreshing side or an indulgent addition, these pairings will elevate your peanut butter cookie experience, making every bite memorable.
Make Ahead Options
These Quick & Easy 3 Ingredient Peanut Butter Cookies are perfect for meal prep, letting you satisfy your sweet cravings quickly on busy days! You can prepare the cookie dough up to 24 hours in advance. Simply mix together the peanut butter, sugar, and egg, then cover the bowl with plastic wrap and refrigerate it. This helps to maintain the dough's quality and flavor. When you're ready to bake, scoop out the dough and flatten it as usual, but keep in mind that you might need to add an extra minute to the baking time if baking straight from the fridge. With these make ahead tips, you'll have delightful, homemade cookies ready to enjoy in no time!
Expert Tips for Peanut Butter Cookies
- Avoid Overmixing: Gently combine ingredients until just mixed to keep your Peanut Butter Cookies chewy and tender instead of tough.
- Watch the Bake Time: Check your cookies frequently; they should be golden on the edges yet soft in the center when you pull them from the oven.
- Peanut Butter Choice: Use creamy or natural peanut butter—just remember that natural might yield a softer cookie, so consider chilling the dough before baking.
- Gentle Flattening: When pressing the cookie balls, a light touch is best, allowing for even baking and preventing flat pancakes!
- Cooling Is Key: Allow cookies to cool completely on the sheet to firm up properly—a few extra minutes can make all the difference in texture.
Storage Tips for Peanut Butter Cookies
- Room Temperature: Store your Peanut Butter Cookies in an airtight container at room temperature for up to 1 week to maintain their chewy texture and flavor.
- Fridge: If you prefer an extra cooling touch, you can keep the cookies in the fridge for up to 2 weeks; just ensure they're well-wrapped to prevent drying out.
- Freezer: For long-term storage, freeze the Peanut Butter Cookies in a single layer on a baking sheet, then transfer them to a freezer-safe bag for up to 3 months.
- Reheating: To enjoy frozen cookies, simply bake them at 350°F (175°C) for an extra 1-2 minutes from frozen—perfectly delightful and still chewy!
Peanut Butter Cookies Recipe FAQs
What type of peanut butter should I use?
Absolutely! For these Peanut Butter Cookies, a creamy or natural peanut butter is ideal. Keep in mind that if you opt for natural peanut butter, the cookies may turn out softer due to the oils. If you like a firmer cookie, you might want to chill the dough for about 30 minutes prior to baking.
How should I store the cookies after baking?
Very! It's best to store your Peanut Butter Cookies in an airtight container at room temperature for up to 1 week. This keeps them deliciously chewy and fresh. If you prefer a cooler treat, they can also be stored in the refrigerator for up to 2 weeks. Just make sure they are well-wrapped to prevent them from drying out.
Can I freeze the cookie dough?
Absolutely! Freezing the dough is a great way to have fresh cookies ready when the craving hits. To freeze, scoop the cookie dough balls onto a baking sheet lined with parchment paper and freeze for about 1-2 hours. Once frozen, transfer them to a freezer-safe bag or container and store for up to 3 months. When you're ready to bake, just pop them straight into the oven for 1-2 extra minutes of baking time.
Why are my cookies spreading too much?
Very! If your Peanut Butter Cookies are spreading too much, it may be due to over-mixing the dough or using too much natural peanut butter that contains excess oil. Make sure to mix just until combined and consider chilling your dough for about 30 minutes before baking. This will help keep them from becoming too flat.
Are these cookies suitable for people with nut allergies?
Definitely! If you're making these Peanut Butter Cookies for someone with a nut allergy, you can substitute peanut butter with sunflower seed butter or almond butter. Both alternatives provide a delicious flavor while keeping the essence of the recipe intact, ensuring everyone gets to enjoy a sweet treat!
How do I know when the cookies are done baking?
Absolutely! Keep an eye on your cookies as they bake. They should be lightly golden around the edges but still soft in the center when you pull them from the oven, typically around 8-10 minutes. Remember, they'll continue to firm up a bit while they cool, so don’t be afraid to take them out a little soft to maintain that perfect chewy texture.
Indulgent Peanut Butter Cookies Made Easy in 3 Steps
Ingredients
Equipment
Method
- Preheat the oven to 350°F (175°C). Gather mixing bowl and utensils.
- In a bowl, combine peanut butter, granulated sugar, and egg. Stir until just combined.
- Scoop the dough into golf ball-sized balls and place on an ungreased baking sheet.
- Flatten each ball with a fork to create a crisscross pattern.
- Bake for 8-10 minutes until edges are golden and centers are soft.
- Let cool on the baking sheet for a few minutes before transferring to a wire rack.
Leave a Reply